Disclosure: This post may include affiliate links through the Amazon affiliate program or other affiliate partnerships. If you click on a link and buy something, I may receive a commission, at no additional cost to you. You can read more boring disclosure details in my disclosure and privacy policy.
This post is an honest, detailed explanation of our DIY half-bath renovation. Read on for information on cost, materials, products, and advice we found useful!
When we moved into our home this June, I had SO MUCH enthusiasm as a new homeowner. Hundreds of project ideas were flying through my mind (and tbh, that hasn’t quite stopped).
Our first priority was our backyard. Our favorite feature of the home is the backyard, and we wanted to enjoy it for the remaining summer months.
After unpacking of course and completing our first major project, DIY String Light Poles and Planters, we turned towards the inside of our house.
Our daughter’s first birthday was quickly approaching in late August, and I wanted to make some serious changes on the inside for her birthday party.
Because the kitchen is a lost cause for now (it’s going to require some professional help), I wanted to update the other area of the main floor that was stuck in the 60’s: Our powder room/half-bath.
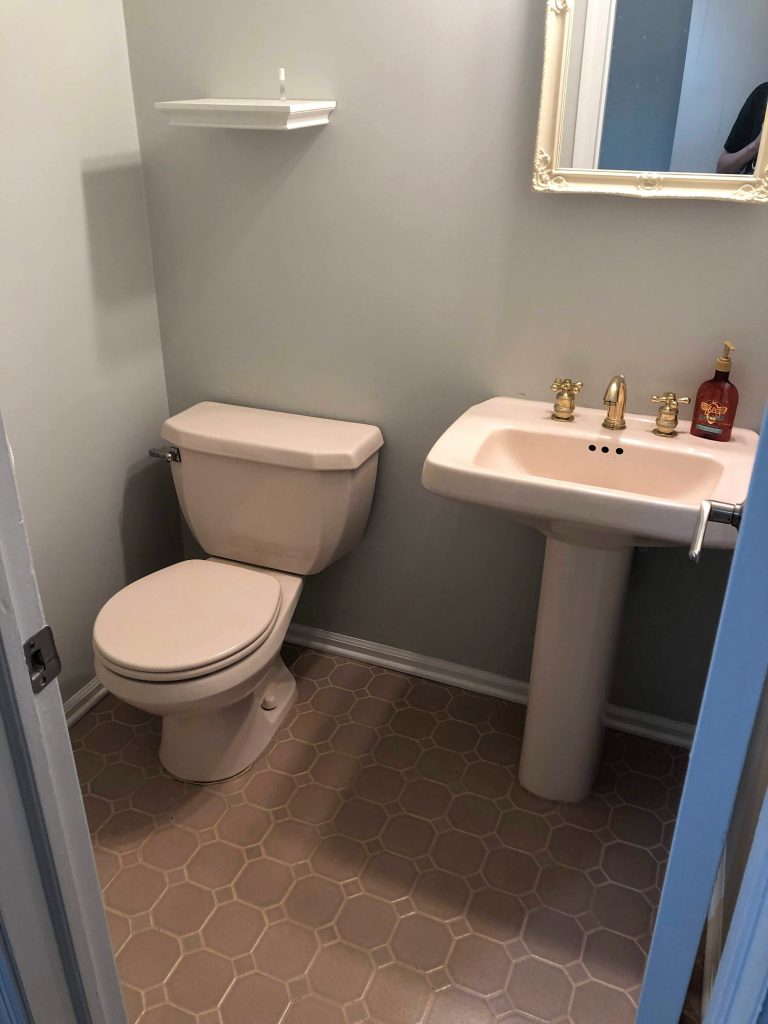
With outdated brass fixtures, a dated pink tile on the floor, and a toilet and sink that had become an odd pink color over time, the entire half-bath needed updating. The only thing that was ok was the paint color- but that color was purposely put in every room in the house to deceive buyers into thinking it was a modern home!
Convinced by online articles and YouTube videos me that redoing a bathroom floor was a simple one-weekend project (ha!), we jumped in headfirst.
Please note that this was my husband and I’s first major home improvement project. I’ve helped my dad out with projects in the past, but my husband is a total rookie. Plus, it’s one thing to help someone else, but another to call the shots yourself.
Demolition
The DIY half-bath renovation began with taking out the toilet and sink. Removing a toilet is surprisingly easy to do. We found this video particularly helpful – I’d say it took all of 10 minutes.
The pedestal sink was a bit trickier due to the nature of the plumbing. This video is really informative. All was well and good until we had to disconnect the drain pipe.
Apparently, homeowners should unscrew and re-screw their pipe connections and turn their water shutoff valves about once a year. This prevents build-up and rust from sealing it in place. This had literally never been done in the history of our home according to our plumber.
The result was that when we finally found a tool that could turn the drain pipe (a massive wrench), the pipe itself crumpled and ripped off the wall. Awesome. As plumbing newbs, this was way out of our league, and thus we incurred our first unexpected cost. A plumber came and replaced the drain pipe for about $250.
Next, we removed the baseboards/trim. We did this ever-so-gently so that we could reuse them, but some parts were nailed on so aggressively that they broke while ripping them off the wall. Not a huge deal though.
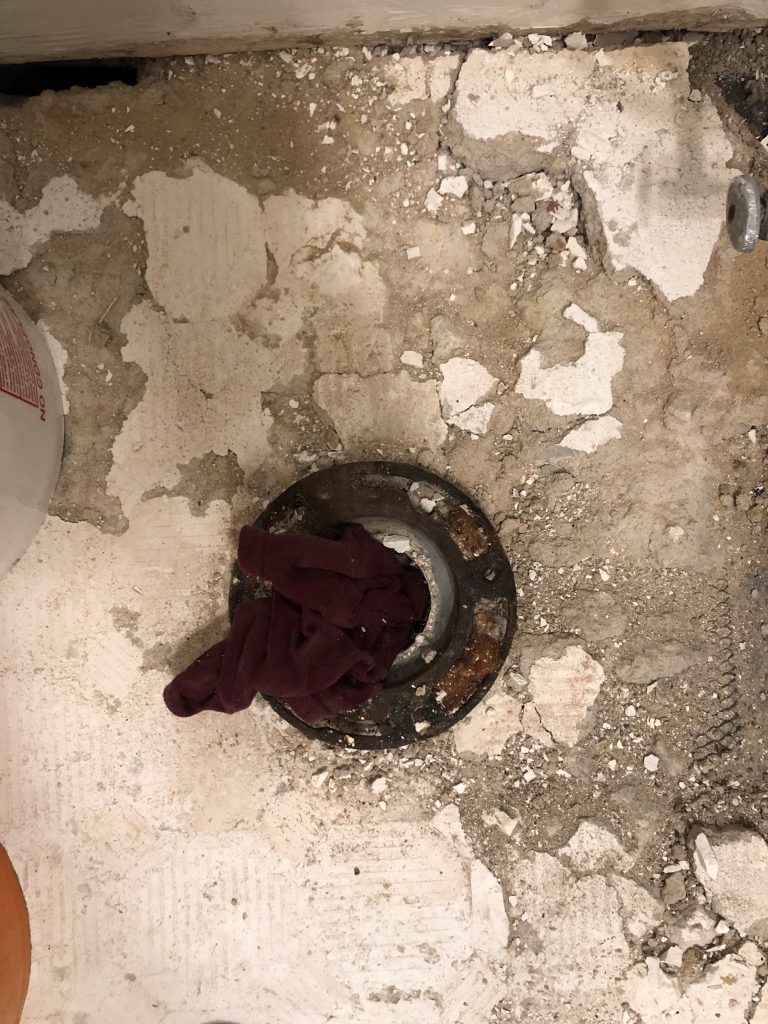
The final part of demo was removing the old flooring. It’s possible we could have tried to tile over the old floor, but several of the tiles cracked and ripped off the floor when we removed the sink. So, with a crowbar and a hammer, we removed the old tile.
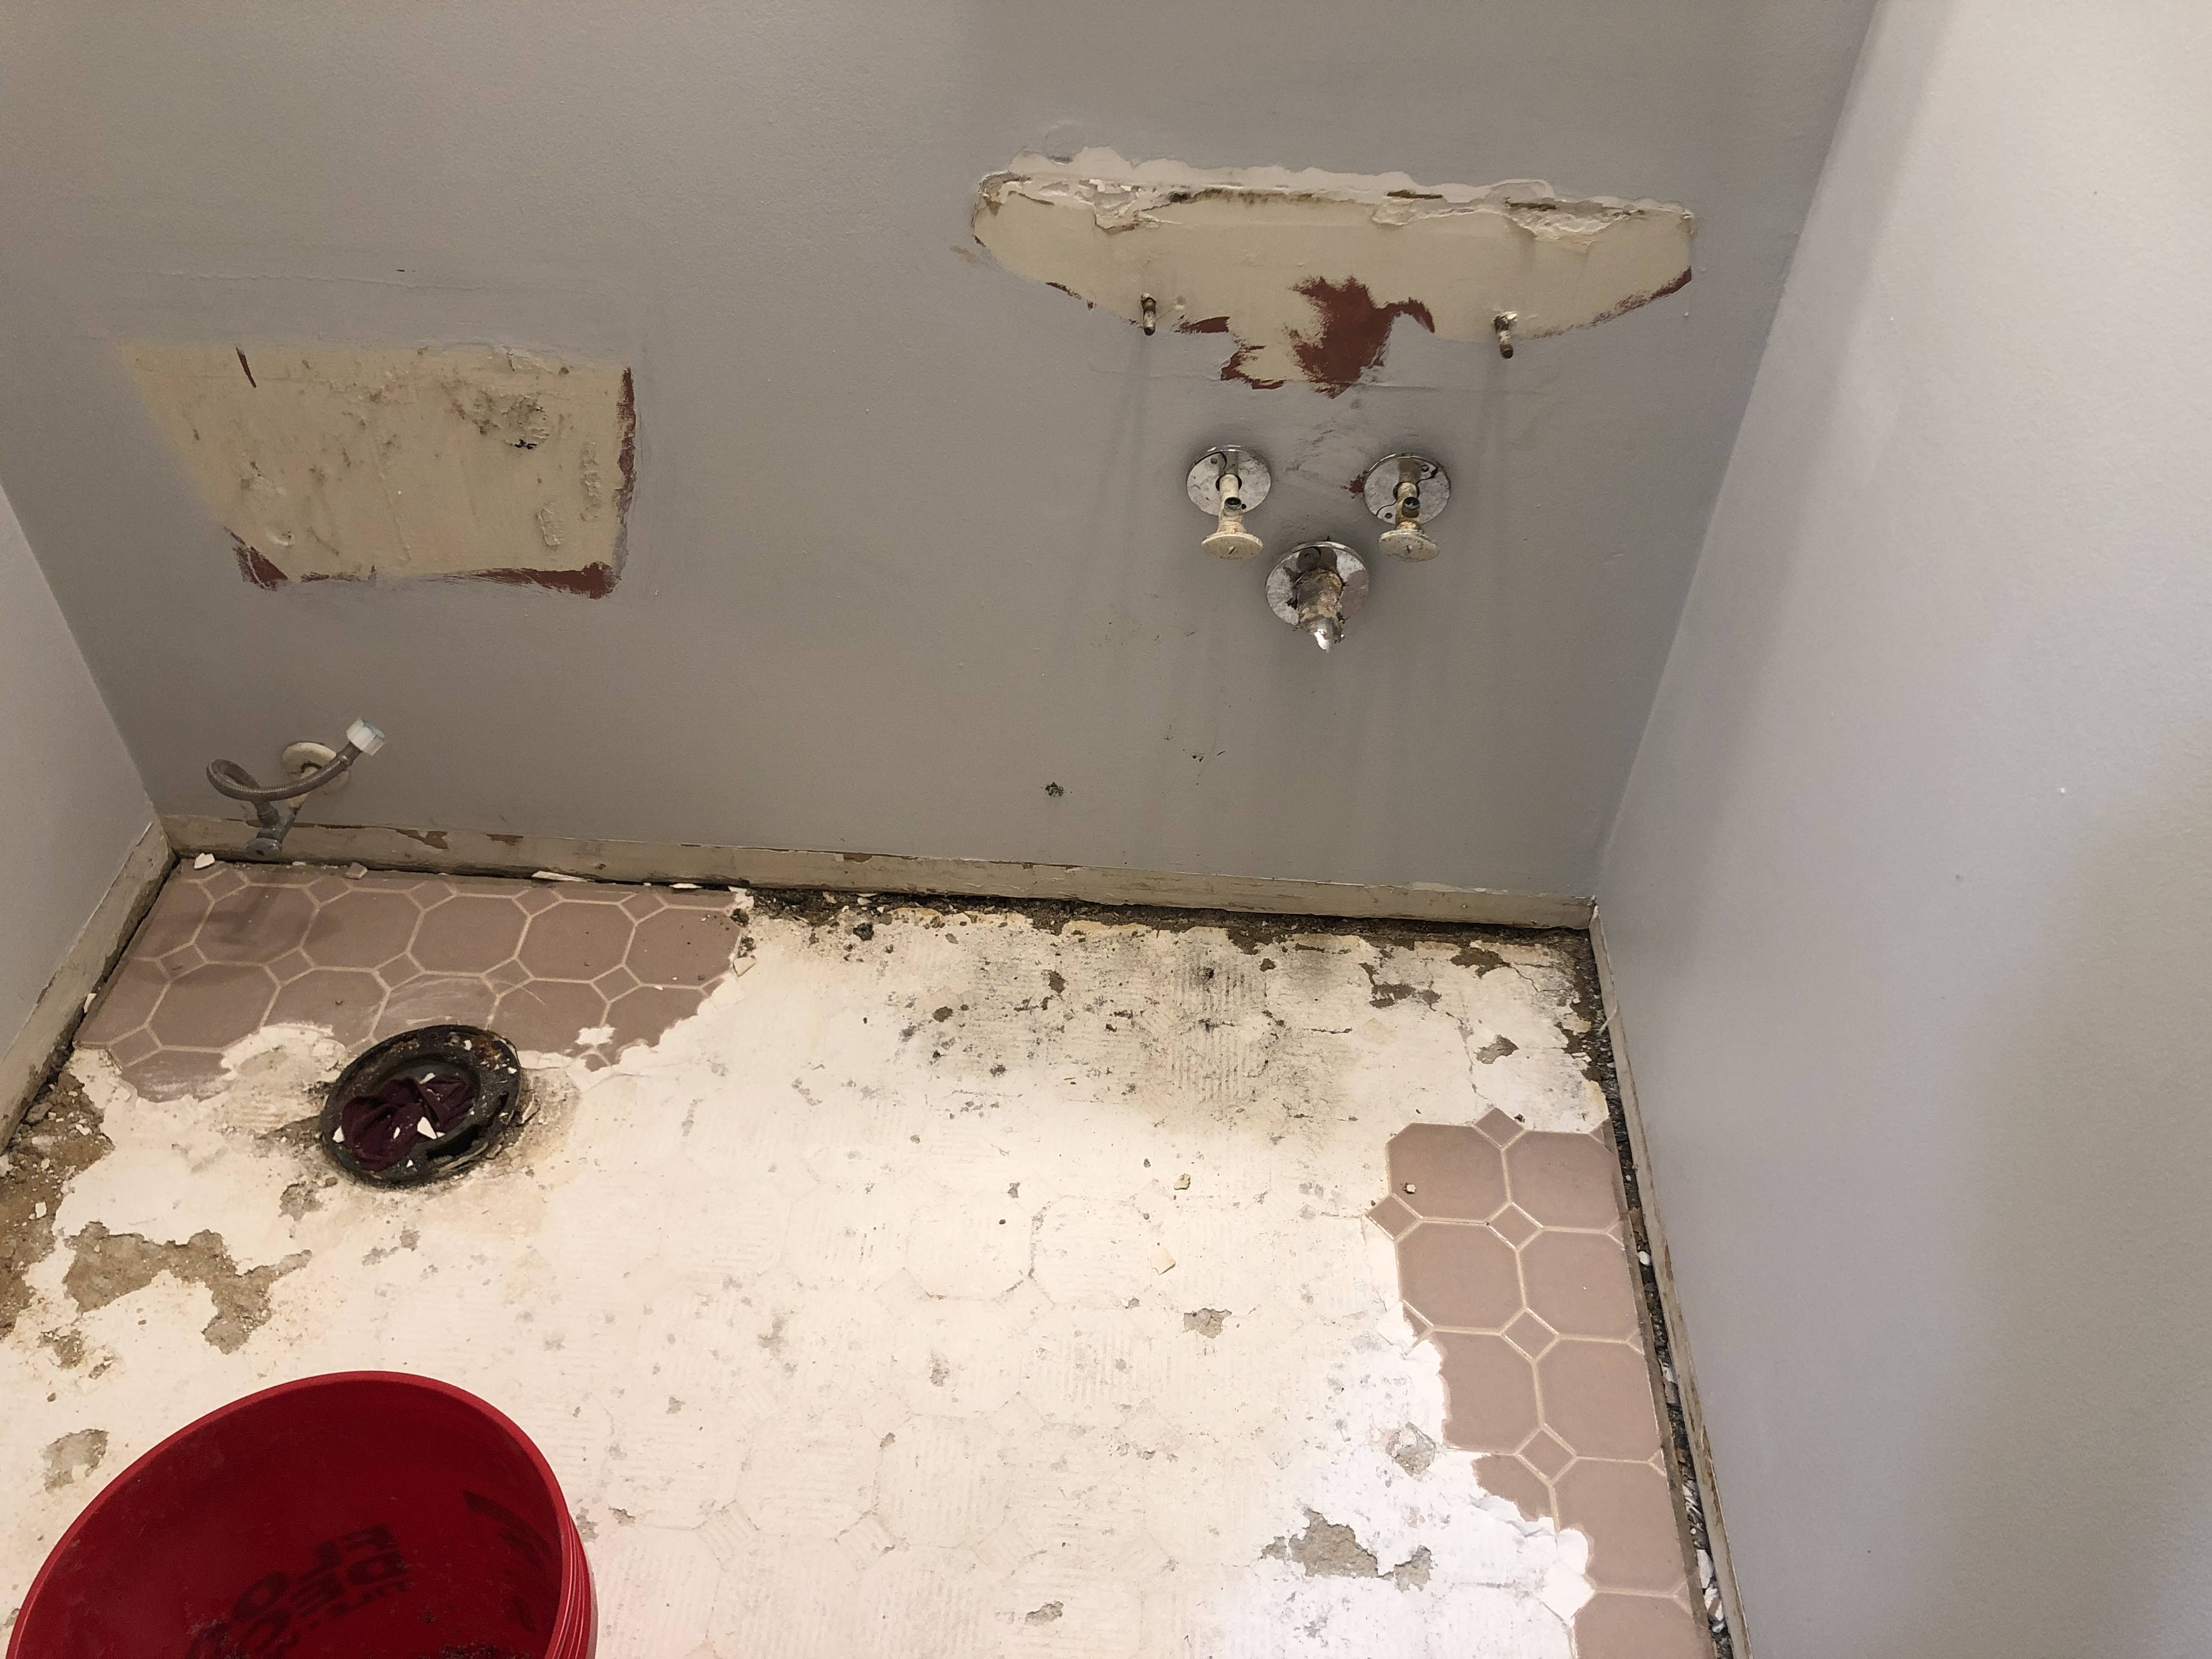
Our half bath is a tiny space, about 20 square feet, so it didn’t take us very long. Some of the tiles ripped right out when we removed the sink. Half of the floor went very smoothly. Unfortunately, with the other half, chunks of the subfloor started to come up with the tile.
The Contractor
“Now, Amy, how can you title this post “DIY Half-Bath Renovation” when you had a contractor help?”
I’m glad you asked. You may have noticed I labeled this section “The Contractor” rather ominously. His role was rather minimal, and we didn’t have the best experience…
At the end of removing the tile, we were left with a very uneven surface that was unacceptable for laying new tile. We researched lots of ways to even it out, such as leveling compound, but none of them fit our situation.
Apparently, our subfloor was a floating subfloor, meaning it didn’t go all the way to the wall. We could see straight through a gap between the wall and the floor to the basement below. All solutions we found involved pouring some type of material, like a leveling compound, that would have gone through the crack in the wall right to the basement.
We were at a loss on what to do, so we decided to have a professional contractor come to install a new subfloor.
This is the point at which the project came to a complete stall. This is the reason why we sadly did not have the bathroom finished by the time my daughter’s birthday party rolled around, much to my dismay!
We had to wait about three weeks for someone to finally call us back and come take a look at the floor. He told us it would be an all-day job, would take three men, and cost a whopping $1000.
The Contractor’s work on our floor actually looked pretty easy; he simply mixed up some thick concrete and spread it on the floor. His guys didn’t show up until 1 pm to start the job, were gone by 4, and apparently “3 men” means one guy is doing part of the job while the other two take a smoke break. This is why I’m not a fan of The Contractor.
Because I observed the men barely working and it took far less time than they estimated, I made my husband negotiate the final payment to $900. Woohoo.
Let me say that the $900 crushes me to my core. I try not to think about the fact that it may have cost the same amount for a contractor to do the whole job after we forked over $900. Someone tell me I’m wrong, please!
Anywho, after The Contractor leveled the floor, we were off to the races again!
Installing the Tile Floor
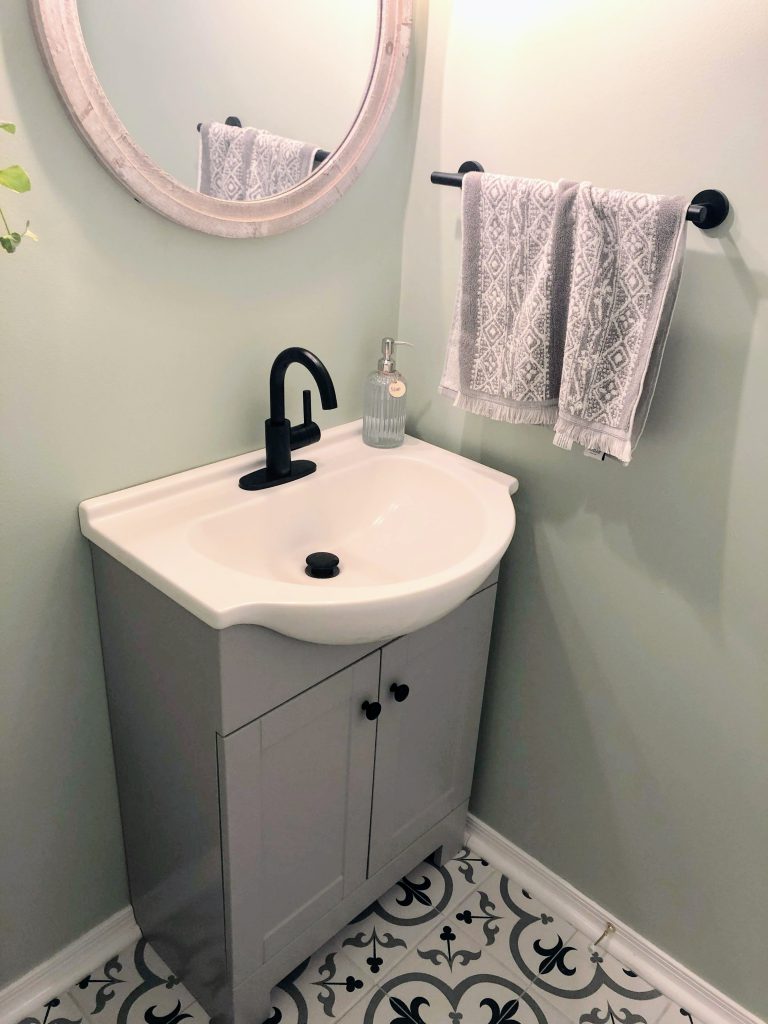
We went with this Florentina Gray Ceramic Tile from Floor and Decor for the flooring.
If you are considering any type of home renovation project requiring tile, check Floor and Decor first. I read about them on a contractor’s blog for keeping costs down during DIY home renovations, and they do not disappoint. You can likely find a similar tile to anything at Home Depot or Lowes for much less at Floor and Decor.
At only $0.89/sq foot, the tile for the entire project, including waste, cost $19.50.
That feels pretty great to say. That number feels so attainable for a new tile floor.
However, while still in budget, the other materials for laying the new tile actually cost more than the tile itself:
- Thinset for large-format tiles – $18.49
- Notched trowel – $2.79
- Spacers – $2.64
- Grout (color is Alabaster) – $10.87
- Grout float – $5.97
- Manual tile cutter – $43.97
- 3 pack of heavy duty sponges – $3.94
- Gloves – $2.99
- Bucket – $2.99
Total cost of all tiling materials and the tile itself for this DIY Half-Bath renovation? $114.15. If you subtract the items that can be reused in future projects (or borrowed from a friend), such as the tile cutter, the total is only $51.50. I like that number much better 😉
Once The Contractor fixed the subfloor, installing the tile was actually very smooth sailing. It was a simple mix thinset -> lay tile -> wait to dry -> grout process!
As DIY newbs, we found the YouTube channel Home RenoVision DIY very useful. The videos are high quality and very thorough, and cover basically every step of the tiling process. Some of them are lengthy, but only because he explains everything in such great detail.
I’m not going to attempt to write out a detailed tutorial on how to lay floor tile, because we are DIY beginners. That would be like someone whose only cooking experience is copying one recipe shown on a Food Network episode writing detailed instructions for Copycat Chipotle Burrito Bowls. I’ll leave the explaining to the pros, just watch the YouTube videos!
Installing the Toilet, Trim, and Vanity in our Half-Bath
As we learned during this project, just when you feel like you’re almost done, you realize there are so many more steps to go!
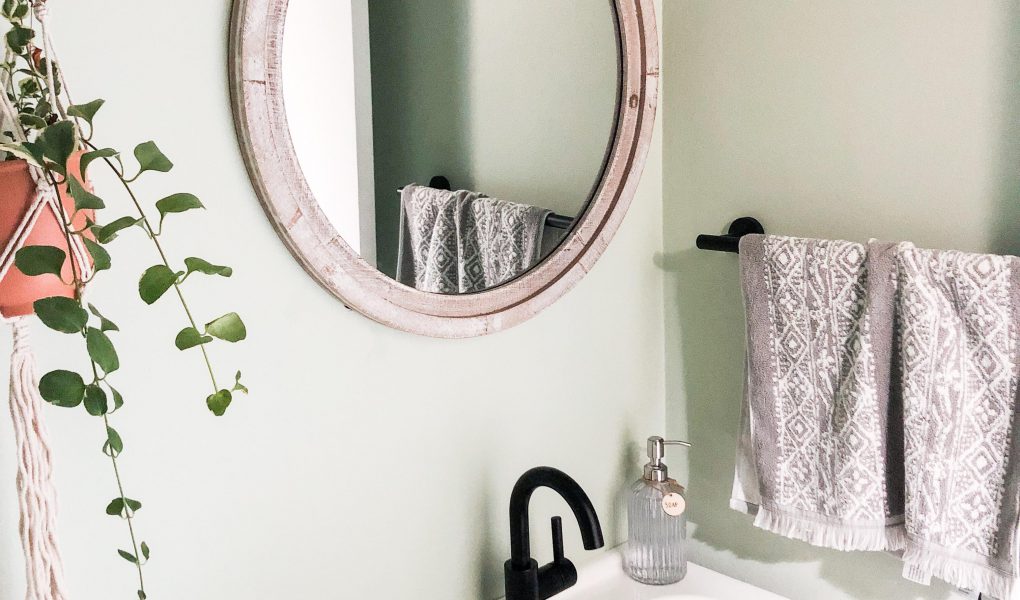
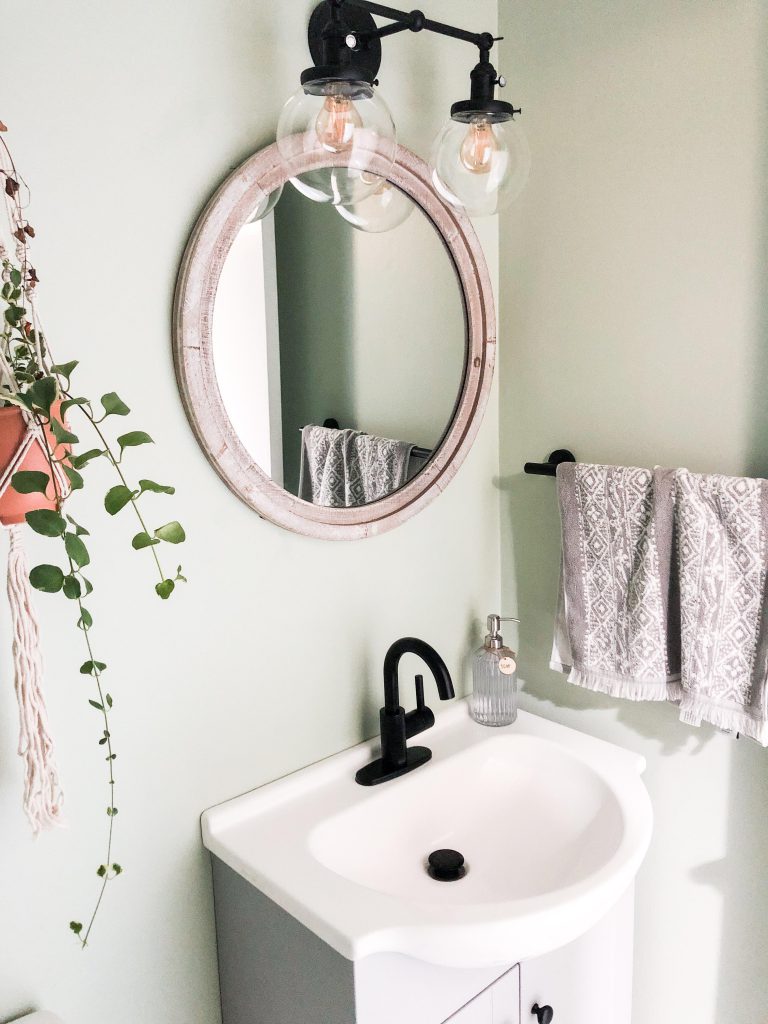
We had the tile floor installed (finally!), so at this point, we had our friend (who used to paint professionally, v convenient) paint the walls for us. We figured it would be easier for him without the toilet or sink in the way. We chose Soft Sage by Behr for the wall color, and the paint cost us $35 for one gallon on sale.
Next, we installed the new toilet. I have no strong passions about something I am going to sit on to pee, so we went with the cheapest possible toilet at $79 from Home Depot. It’s worked just fine. Luckily, the installation went smoothly, with the help of a few YouTube videos.
Next, we installed the trim/new baseboards. Luckily, trim is a very cheap material. I’ve lost our receipt, but I believe the total was about $35 for trim, nails, and paint for the baseboards. This part of the project also went smoothly with very careful measuring and the use of our miter saw.
Finally, we looked for the replacement to the old yellowed sink. Originally, we were going to replace it with a different pedestal sink. We decided against this for three reasons:
- Pedestal sinks are more expensive.
- They don’t offer any storage.
- The plumbing is far more complicated, and thus not DIY-friendly (re: could be expensive, or just very frustrating).
We ended up choosing this shallow-depth vanity from Lowes that fit our space perfectly. It was stylish but also very budget-friendly at $159. I have lost the receipt for the plumbing parts, but they were also cheap at about $10.
Finishing Touches
Ah, now this is the fun part of redoing a room – all the personal touches that really make it come to life!
This is also the part of the job that adds up very quickly. But, as first-time homeowners, we luckily had a budget for all of the small things you need when buying a home. Like toilet paper holders – why are they so expensive?!
- Bathroom Faucet – $79 at Lowes
- Round Mirror – $35 on sale at Hobby Lobby, all wall decor is 50% off every other week!
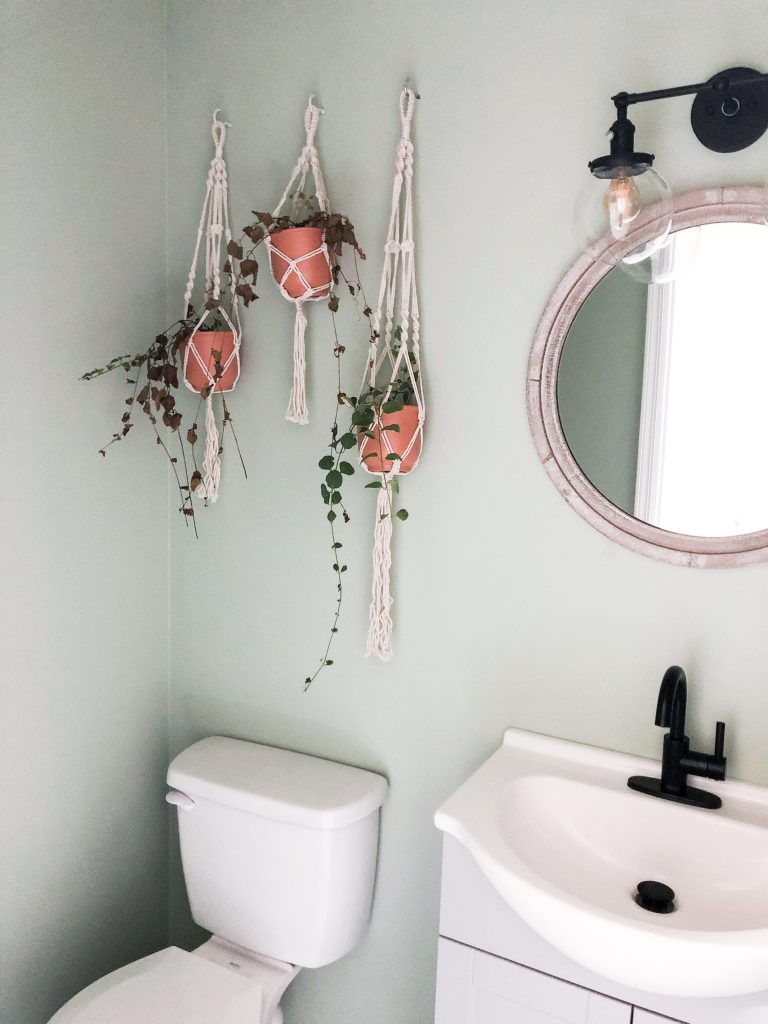
- Ikea plant pots – $3.99 each
- Hand towel – $10.00 at Target
We found that Amazon is a great source of home improvement goods for much less than big box stores. Stores like Marshalls and TJ Maxx are also a great place to shop for these items, but I highly recommend Amazon for the parts of your bathroom that you need to match.
- Light fixture – $99
- Towel bar – $17.99, we got the round hand-towel size
- toilet paper holder – $11.60
- Soap dispenser – $9.99
- Macrame plant hangers – 3-pack for $9.98, though we got it on sale for $7.99 on Prime Day.
Total Cost Breakdown & Completed DIY Half-Bath Renovation Reveal
When stating a total estimated cost for this DIY half-bath renovation, I don’t think it’s fair to only share one number. This is because each home renovation project is going to be a bit different for everyone:
- We ran into unexpected costs that might not affect everyone, like plumbing and The Contractor.
- Your bathroom is likely not the exact same size as ours, and thus you will have a different total square footage.
- Everyone has different tastes in finishes, that will incur a wide range of costs.
So, in light of these factors that cause home remodeling costs to vary, I’m going to share the total cost, the cost without professional labor expenses, and the cost of materials not including accessories.
As a refresher, here is the total itemized list for the entire DIY half-bath renovation:
- 114.15 – Flooring, all materials, and newly purchased tools
- 250 – Plumber
- 900 – Contractor
- 35 – paint
- 79 – toilet
- 35 – trim/baseboards
- 159 – vanity
- 79 – faucet
- 35 – mirror
- 12 – plant pots
- 10 – hand towel
- 99 – light fixture
- 18 – towel bar
- 11.60 – toilet paper holder
- 9.99 – soap dispenser
- 7.99 – macrame plant hangers
The total cost of this DIY half-bath renovation, including all materials, the emergency plumbing help and contracting work, and all accessories: $1854.73
Without the gut-wrenching, horrible costs of The Contractor and plumber that probably could have been avoided under different circumstances, the total cost of this project was $704.73.
I actually think this is a reasonable cost estimate for a DIY project of a half-bath that is less than 20 square feet. This is much closer to the amount we originally budgeted for, and I think if we had a more experienced person to guide us, this is closer to the amount we would have spent.
The total cost of all materials, including flooring, paint, trim, the toilet, sink, faucet, and lighting: $537.50
Hopefully these numbers are helpful to you as you estimate the costs of a half-bath renovation in your home. Budgeting and healthy expectations are key when starting any home project!
Let me know if you have any questions, or found this inspiring for a home makeover project of your own! I’d love to help!


Great job! We are doing exactly what you did here, but our faucet sunk drain was meant for overflow style sink, we got same sink and faucet you guys got, did you run into this issue as well? Thanks for a great post.
Huh that’s interesting, we did struggle to secure the sink drain, but we weren’t sure why. Eventually we had a friend help us, but that could have been the reason why it didn’t attach very well. Glad you found the post helpful!