Disclosure: This post may include affiliate links through the Amazon affiliate program or other affiliate partnerships. If you click on a link and buy something, I may receive a commission, at no additional cost to you. You can read more boring disclosure details in my disclosure and privacy policy.

Last summer, my husband and I moved into our 3rd rental home. The house has a really cool outdoor area – it’s a quaint, tiny backyard with a beautiful tree growing right in the middle of the yard. We live in a small, commuter town of NJ, so rather than grass, the backyard has been paved over with square cement tiles.
When we saw the small cement backyard, we instantly thought “fire pit!” And you know how the saying goes, “If you give a girl a fire pit, she’s going to want an awesome couch to with it.” I’m pretty sure that’s in page two of the classic children’s book, look it up 😉
And so the search for the outdoor furniture began! I looked on Facebook Marketplace, at large discount stores, on Craigslist – and yet I didn’t find anything less than $400. That was simply way too much to pay for a rental home that we would be moving out of in a couple of years.
I also looked into making one of the beautiful pallet couches I’ve seen all over Pinterest. But between the carpentry work, the custom-cut cushions, and fabric, that project was going to be at least $200 as well.
The month after we moved in, we drove down to my family in NC for our first baby shower. While we were there, my mom casually asked if we wanted this old couch that had been in the garage for years:
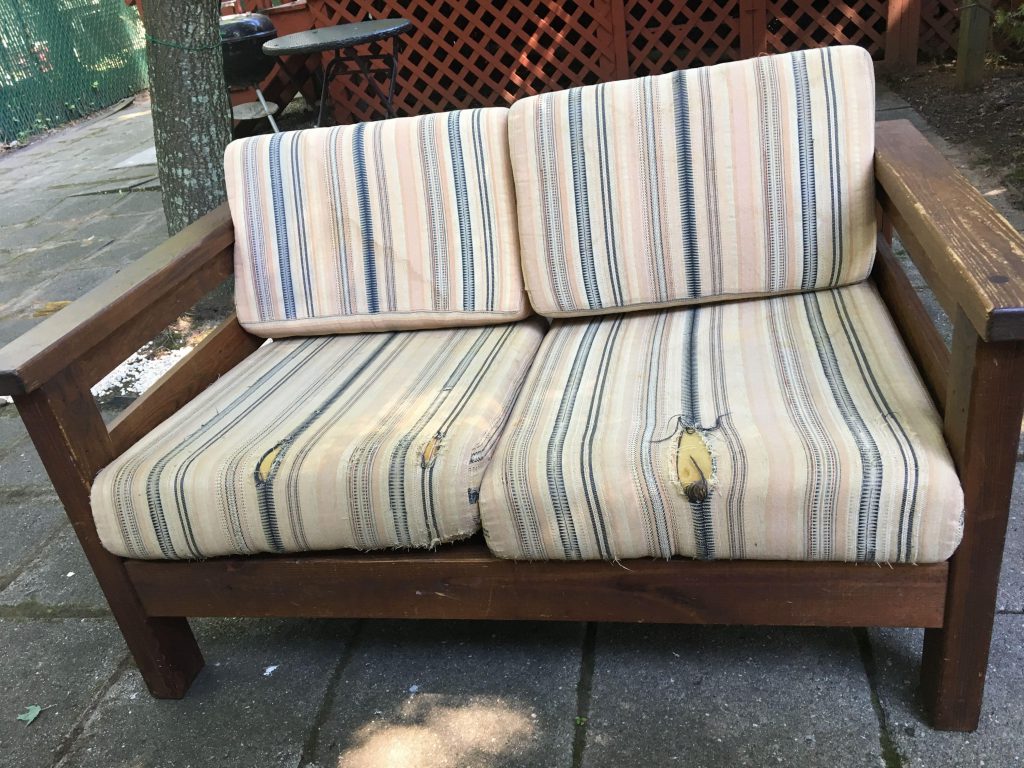
Ummm… YES! It was solid wood cargo furniture, well-built, and best of all, FREE! My dad actually bought that couch in college almost 40 years ago. So, by some miracle we shoved it in the back of our SUV and drove all the way back to NJ, ready to tackle a project.
This post will show you how I transformed the ugly cargo couch into a beautiful outdoor piece. The technique really is so simple, and gives you lots of freedom to make it your own!
Materials
For this project, you will need:
- Furniture – the great thing about this project is that it is using a piece of solid wood furniture that would be considered outdated, so hopefully you can find a piece being given away for free. You just have to recognize its potential, and then make it beautiful again.
- Paintbrush – one you don’t mind throwing away after!
- Paint – matte finish
- Sandpaper – any grit
- Polyurethane – I went with a matte finish. You pick!
- Fabric
- Safety Pins
The Process
Before painting your couch (or any wooden furniture you’ve chosen to use for the outdoors), give it a good wipe down to get rid of any dust or debris.
For the paint, I went with Behr’s premium plus:
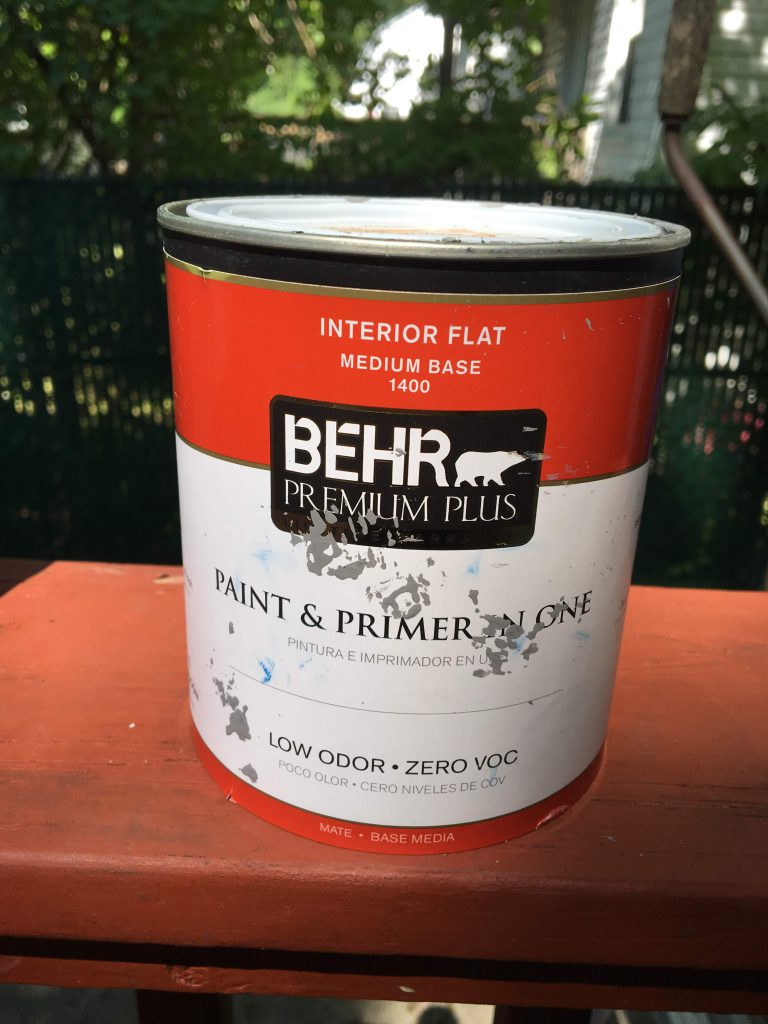
Keep in mind that this might not be the typical paint someone at a hardware store would recommend for an outdoor project, because it is interior paint. I chose this paint for my bedroom dressers, and decided to re-use it for the outdoor couch because it was what I had on hand. Because the paint is sealed with Polyurethane after it dries, the indoor/outdoor nature of the paint doesn’t matter.
For my color choice, I went with a medium grey-blue. You’ll also notice that this is a quart-sized container of paint. If you are buying paint specifically for this project, I would recommend getting a sample can. Samples can be found at the paint counter of large home improvement stores, and they’re only about $5.
If you’re worried you won’t have enough paint for your one piece of furniture if you get the sample, don’t be! I bought this quart of paint to do one dresser. I have actually ended up painting three dressers, a headboard, and this outdoor couch, and I’m still not even halfway done with the bucket!
Dry Brushing
The reason why this technique uses so little paint is because of a handy technique called dry brushing. Because of the dry brushing, I also recommend that you get the cheapest brush you can find, because the paint may dry on the brush as you’re painting. This would ruin any fancy paintbrush, so please don’t spend more than one dollar!
I happen to love dry brushing because it:
- Uses very little paint, so it’s cost effective
- Allows the natural textures and grains of the wood to shine through.
- Allows the natural color of the wood to shine through.
- Gives an instantly rustic appearance
- Looks more sophisticated than fully painting the furniture
- Is simpler (and cheaper) than brushing and sanding layers and layers of chalk paint
Before you begin dry brushing, I recommend keeping a paper towel or something nearby where you can brush off extra paint.
When loading your brush with paint, you want to barely dip your brush into the paint:
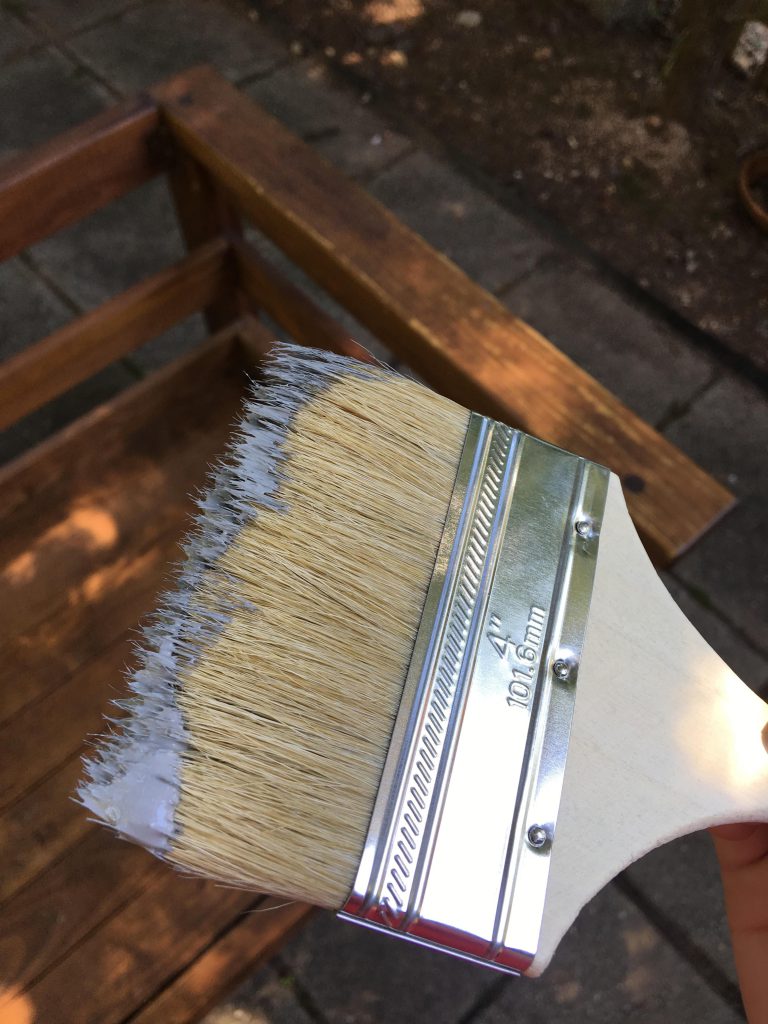
Some people may recommend you only dip into the residual paint on the lid of the paint can so that just the top of the brush is being covered with paint. I knew I wanted slightly more coverage, so I knew I could put slightly more paint on my brush.
If you aren’t sure what look you’re going for, be conservative! It is very easy to add more paint, but it is hard to take it away. Don’t be afraid to use that paper towel and wipe off any excess paint. If you dip your brush way too much, and all else fails, you can spray the paint off your furniture with water as long as it’s latex-based. Then, go wash out your brush, let it dry, and try again the next day!
So, after loading your brush, brush the paint onto the wood with the grain using long, sweeping motions. It’s also important to work very quickly and by section; the paint will dry very quickly since you are working with very little of it, and if you don’t work quickly, it may become patchy.
Here is what some sections looked like after dry brushing:

This is the part where you get to decide how you want your furniture to look. If you want more wood to shine through, add less paint, and vice versa! The important thing to remember is that it is really hard to mess this up! If all else fails, you can just fully paint it, and it will look great anyway!
Sanding
After the paint is finished and dried, I recommend using sandpaper to achieve a more naturally distressed look.
If there are some areas where you used a little too much paint but it has already dried, run some sandpaper over the area until you are satisfied.
To make your furniture look rustic or distressed, sand down parts of the furniture that would naturally get a lot of wear and tear, such as corners and edges.

Sealing
Once you’re done sanding, take a damp cloth and wipe down the entire piece of furniture to prepare for the polyurethane.
This is a crucial step! You need to wipe off any sawdust created by the sandpaper so that the polyurethane can adhere with a smooth finish. Wiping down will also clear off any unwanted debris from the surface. Take it from someone who learned their lesson the hard way; unless you permanently want a mosquito memorial on the arm of your chair, clean it first.
The polyurethane itself is also very important to make the couch weatherproof. This stuff will seal the wood from the elements and keep it from rotting, and keep the latex-based paint from washing off. My couch has been outside for almost a year now and it has held up great!

This is the polyurethane I use for all my projects. Full disclosure, I haven’t actually tried anything else, but this stuff works great! This is probably the most expensive component, but you will be able to do a lot of projects with one can this size.
Follow the instructions on your can and be sure to cover all areas of the furniture.
Cushions
Now, something has to be done about those hideous cushions, right? I looked into making entirely new cushions, but after a lot of research, I learned that pretty much any cushion insert will cost a fortune. So, the old ones had to make do.
For this project, I went with a fun colored fabric in the cheapest material possible.
I debated buying indoor/outdoor fabric, but at $13 or more per yard, that was way more than I was willing to spend. I decided instead to go with a simple muslin fabric because it was soft and it would be easy for me to pin into the cushions, rather than sewing zippers. Best of all, it was only $2 a yard.
Before wrapping your cushions, iron the fabric so that there are no harsh lines on the fabric from months of it sitting in the store.
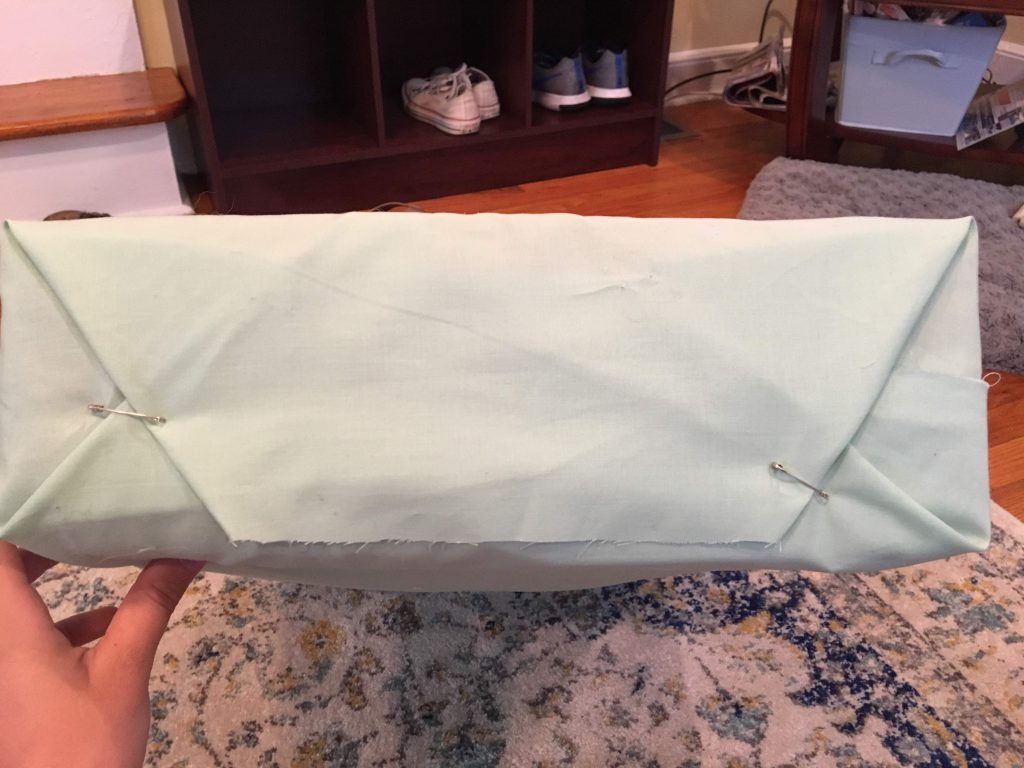
Next, in order to avoid sewing, I chose to wrap the couch cushions like a Christmas present and secure the fabric with safety pins. Be sure that the safety pins are on the outside of the cushion, not where people’s legs will be.
Finally, you can try to weatherproof your cushions with a waterproof spray. But honestly, I tried this and it was a massive fail and a waste of money. Instead, I keep the cushions out of the elements when they aren’t in use.
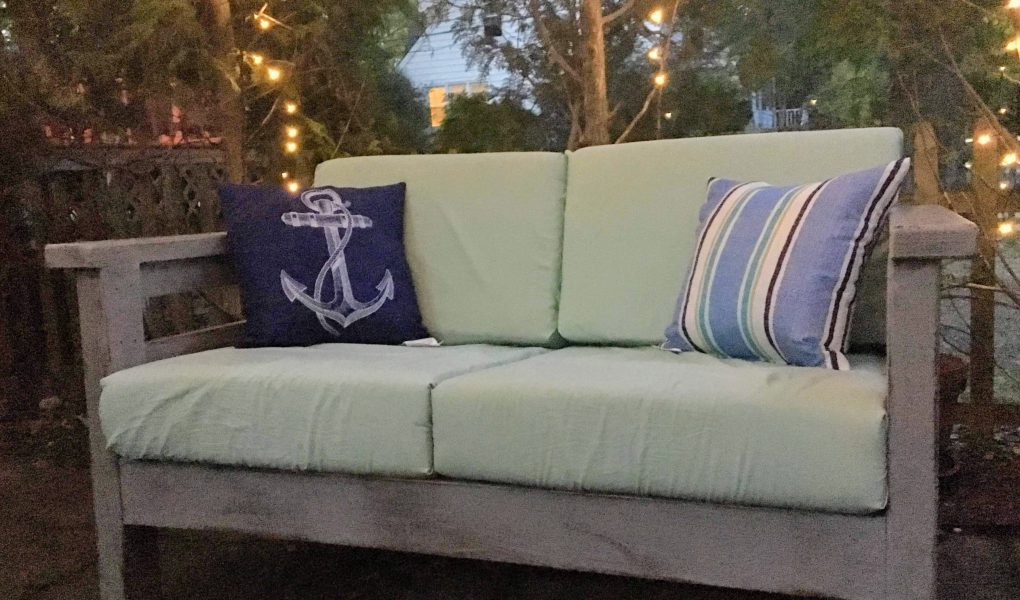
The Final Product
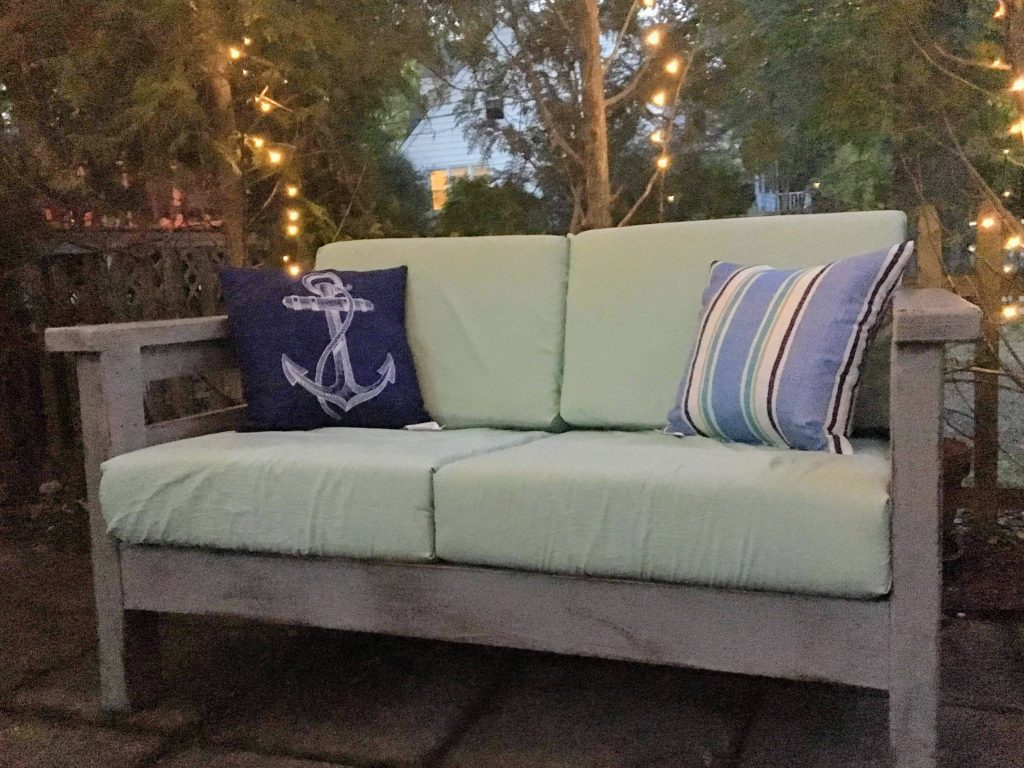
When it’s all said and done, we now have a comfy couch that’s perfect for s’mores and campfires. I snagged those pillows on clearance from Walmart for $3, and we added some lights for ambiance.
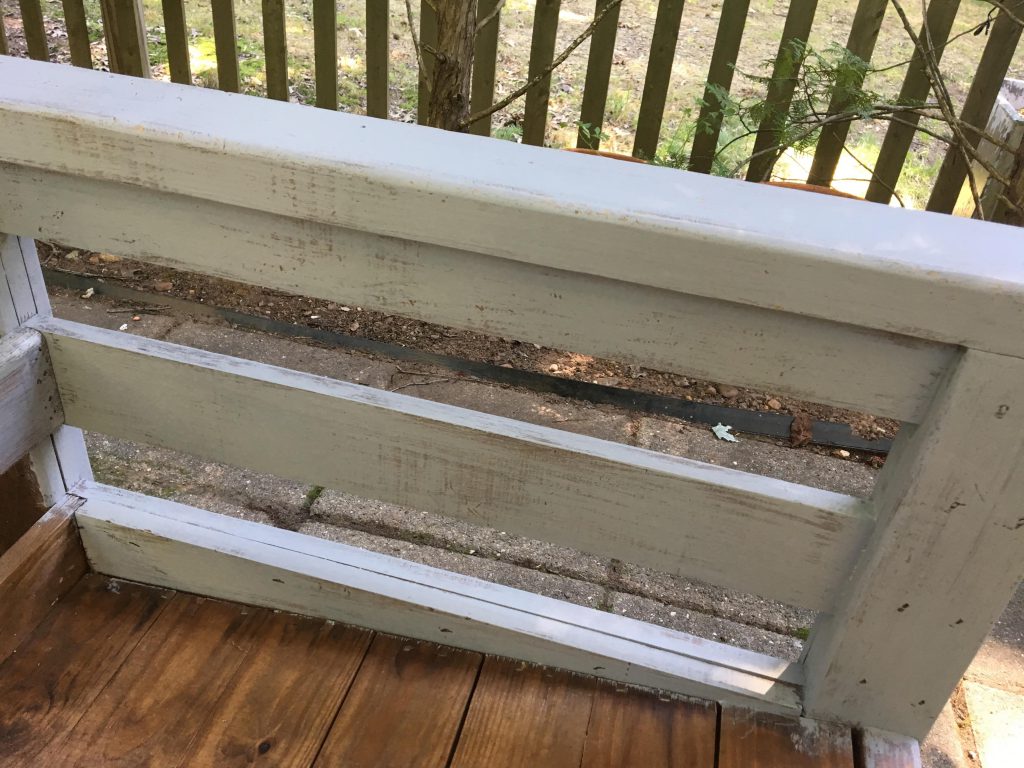
Looking back, I would have chosen a different fabric, as I discovered that it wasn’t outdoor friendly at all because it stains and wrinkles easily (see picture above). You may want to choose a fabric a bit thicker than the muslin. Eventually, I’ll recover the cushions using the proper fabric.
Cost Breakdown
- FREE – couch
- $1 – Paintbrush
- $5 – Paint
- $5 – Polyurethane
- $.50 – Sandpaper
- $12 – Fabric
Total Cost: Less than $25!
I hope that some of you end up refinishing furniture to spruce up your outdoor space as you prepare for summer!
Send me a picture, or paste one in the comments below and let me know how it went!