Disclosure: This post may include affiliate links through the Amazon affiliate program or other affiliate partnerships. If you click on a link and buy something, I may receive a commission, at no additional cost to you. You can read more boring disclosure details in my disclosure and privacy policy.
Think you need to spend thousands to modernize your fireplace? Think again! This tutorial on our DIY fireplace renovation will explain how we updated our living room for a few hundred dollars and a few days.
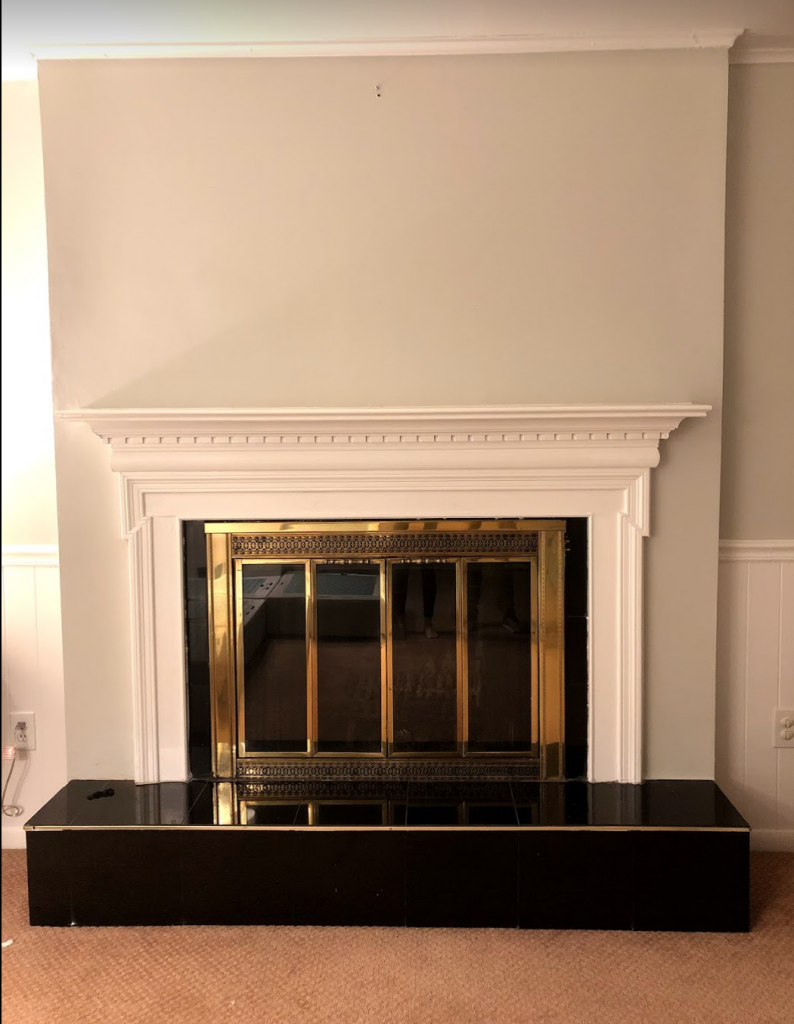
When we bought our house last summer, the inspection revealed that the wood-burning fireplace was unsafe. Luckily, because it was a safety issue, we were able to get a credit in the sale of the house to fix the fireplace.
When fall rolled around and we started looking at quotes to fix the fireplace, we discovered that it was actually more expensive to make it safe for burning wood than to convert it to gas. We figured we would use a gas fireplace more anyway because they require zero maintenance or chopping wood, so we decided to get a gas insert installed.
When the technicians came to install the insert, they discovered that whoever decided to put the horrible black tile over the brick did it incorrectly. This gave us three options:
- Install the insert anyway, but there would be some partial black tiles, old dirty bricks, and old mortar showing. AKA it would be functional, but very ugly.
- Pay the fireplace company to do the tile work for about $2000 dollars.
- Redo the tile ourselves and call the fireplace people when we were done to install the insert.
At this point, we had already completed our half-bath renovation, so we had some experience with tile work. We were fairly confident we could do a decent DIY fireplace renovation.
We’d also already paid for the gas insert in full, so there was no going back. We figured while we were paying for the gas insert, it might as well look good too. Once they installed the insert, it would be too late to change the tile.
So, we decided to jump head-first into this DIY fireplace renovation. And ya know, I’m not actually that mad about it – it gave me a great excuse to get rid of the black tile I hated so much!
While we did lots of research beforehand, none of the tutorials online exactly fit our situation. A lot of this project was completed with lots of problem-solving along the way. I’m sharing this tutorial now in hopes that it will inspire you, or that you may be able to follow the bits and pieces that apply to your own DIY fireplace renovation.
Designing our DIY Fireplace Renovation
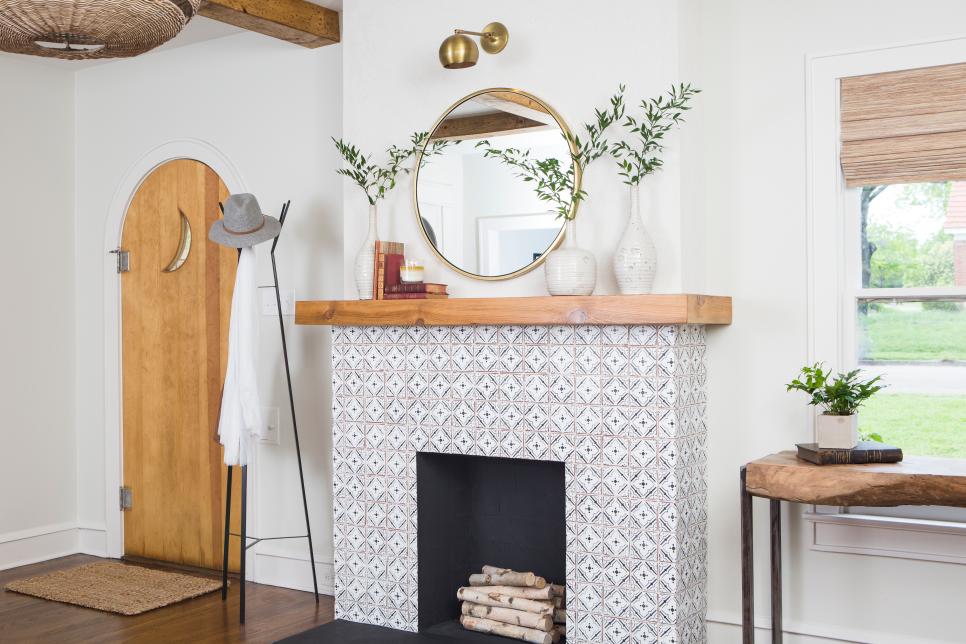
When we set out to redo the fireplace, I originally had a very modern look in mind. Meaning, a rustic, faux-beam mantel with a tiled surround like the picture below:
My husband, however, had some objections. He pointed out that the mantel we already had, though traditional in style, was actually very unique and added value to the home. He thought it would be a waste to tear off a beautiful mantel and replace it with one I DIYed.
He also had several reservations about the intensity of the project. Our fireplace was originally brick, then was drywalled over at some point, with tile installed around the fireplace opening. To recreate the look I wanted, we weren’t sure what we were getting into. For example, we were going to have to figure out a way to make the surface even with the drywall after removing the mantel. As I was 7 months pregnant at the time of the project, simplicity was a priority.
Finally, the fireplaces that are featured with lots of tile and a simple, faux-beam mantel do not have hearths. We weren’t sure how to work a hearth into the design of a modern fireplace. Removing the hearth was not an option for us, as that would not meet fire code in our township.
When designing your own fireplace, be sure to research the local regulations for combustible materials surrounding the fireplace so that it will pass inspection.
We ended up compromising by agreeing to leave the original mantel, but by retiling the surround and hearth with a more modern tile. We also decided the cheapest option for redoing the hearth was to cover the black tile with wood to create a shiplap sort of look.
The Materials
For the tiles for this project, we found a mosaic tile that we loved at Floor and Decor. If you’ve been following this blog for any amount of time, this should not come as a surprise – we shopped at Floor and Decor for tiles for our half-bath renovation as well. They have great prices at a fraction of the cost of typical home improvement stores.
Because we needed such a small amount of tile, I kind of splurged on this tile mosaic, which came in at a total cost of $207.76. This cost could certainly be lower with a less expensive tile. However, thanks to owning most of the tools and having leftover materials from the half-bath, the tile was our main expense.
The other materials needed and other expenses for the project were really very minimal:
- Tile Saw Rental – Due to the size and complex nature of the mosaic tile, we had to rent the largest size tile saw from Home Depot for $89 for 24 hours. I do think an electric tile saw was absolutely necessary for this project, as we had very odd sizes and shapes we needed to cut. A manual tile cutter will work just fine if you are only doing perpendicular cuts on square/rectangular tiles.
- Grout – We needed unsanded grout for this mosaic tile, at $10/bag. Only one bag is needed for the small square footage.
- Wood – The wood used was 4 1x4s and 2 1×2. The cost for the wood was approximately $25.
- Liquid Nails – we used 3 bottles for a total of $10.63.
Total cost for this DIY Fireplace Renovation? $342.39.
Side note: Curious how we actually find the money to pay for these small home improvement projects? Check out my post on the 4 websites I use to make money from home.
Step-by-Step Tutorial for the DIY Fireplace Tile
I apologize in advance for the minimal photos we have on the process. I switched phones during the renovation and lost most of the photos I took. For short videos of this process, be sure to check out the “Fireplace Reno” highlight on my Instagram profile!
Step 1: Remove old tile
Before laying down any new tile, it is important that you have a level, relatively smooth surface. Remove any cracked or loose tiles. If you have tiles that are in good shape and are still very secure, such as the ones we had on our hearth, there is no need to remove them. You can simply tile over the existing tile.
If you are tiling over a brick fireplace, as long as the mortar is in good shape, you can tile over the brick without any extra steps. The thinset will simply fill in all of the gaps of the mortar.
If you have a particularly rough/uneven surface, or the mortar has worn away from between the bricks, you may need to install cement backer board. Honestly, we probably should have done this on the top of our fireplace surround, but we didn’t realize the mortar was in such terrible shape around the bricks until it was too late. This resulted in a slightly uneven tile job, but hey, live and learn.
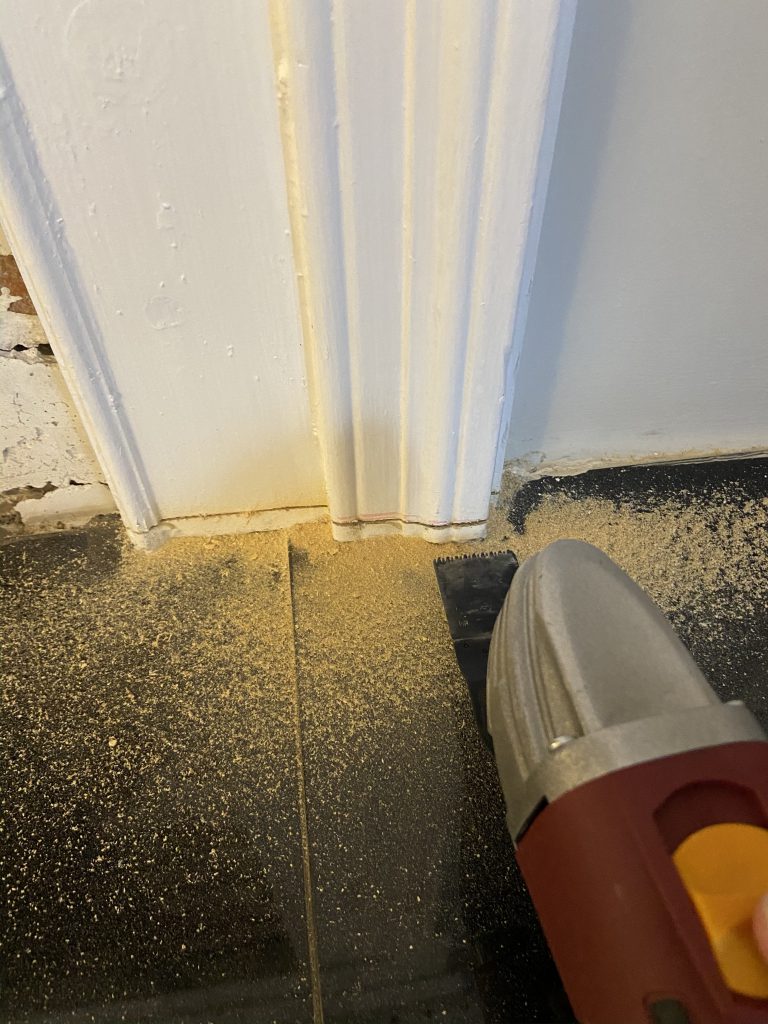
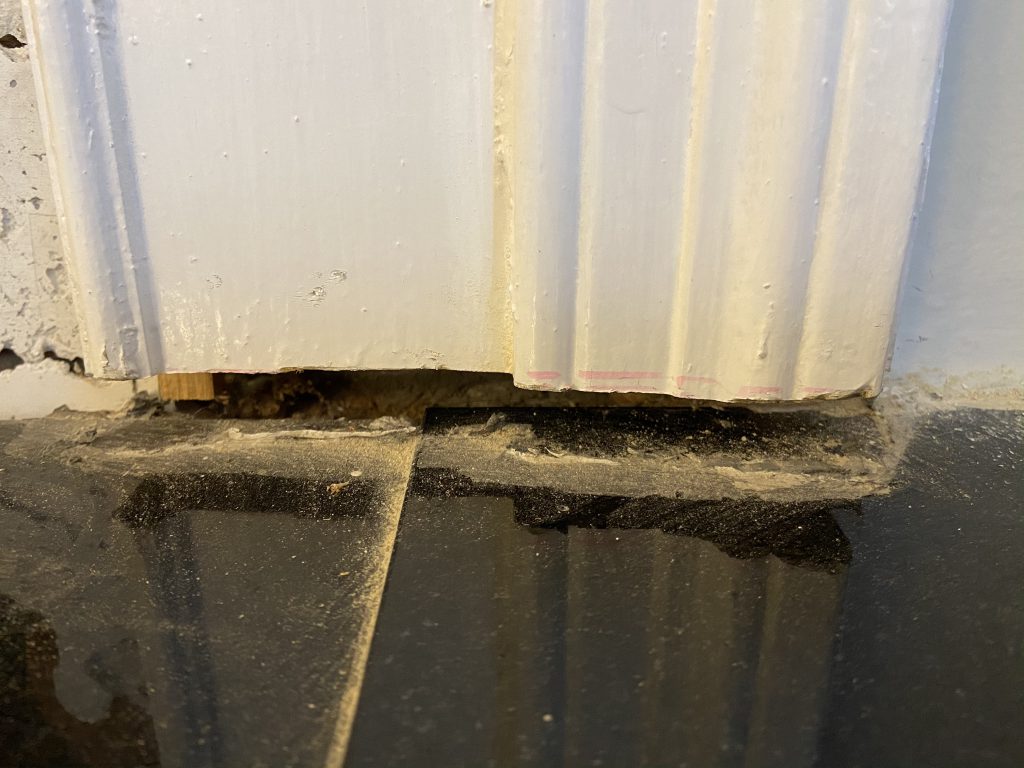
Step 2: Remove excess mantle to make way for new tile
When tiling over previously existing tile, the new tiles will add a bit of height. In our case, because the mantel went all the way down to the hearth, this was a problem we had to solve.
Rather than try to cut the tiles to fit around the mantel, which would have been nearly impossible, we needed to remove about 1/2 inch of the mantel on each side.
We did this using a simple oscillating multi-tool. They’re relatively inexpensive and very effective at this type of task. I’ve found mine to be useful for a variety of home projects. It only took us about 20 minutes.
Step 3: Cut and dry-lay tiles
Before mixing any thinset to adhere the tiles to the fireplace, it’s best to complete all of your tile cuts. This is because once the thinset is mixed, you have a limited amount of time to work with before it sets or dries out.
This was by far the longest, most labor-intensive part of the project. Between trying to keep our toddler out of trouble and measuring all of the cuts, it took us about 6 or 7 hours to finish cutting the tile. I really think this would only take about 2-3 hours if you don’t have toddlers, or are using a less complicated tile pattern.
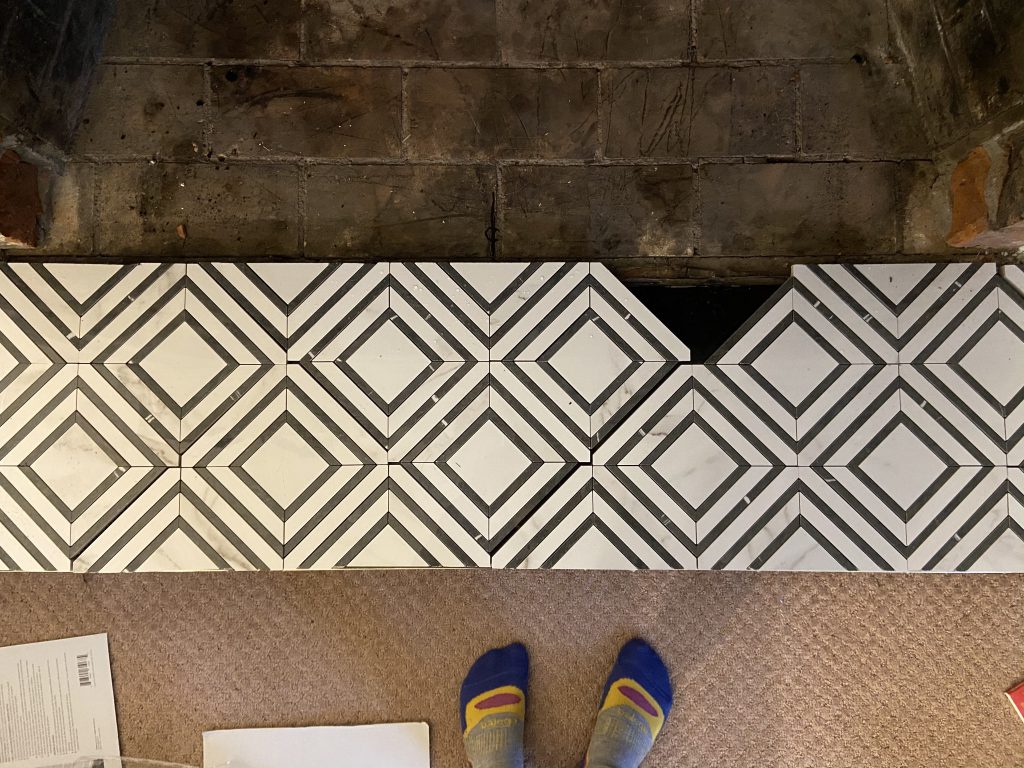
Due to the nature of the complex tile pattern (which, FYI, I’m super proud of us for doing successfully), dry-laying our tile was like completing a really complicated puzzle. It is very easy to visualize and measure cuts on a horizontal surface, but the vertical surface of the fireplace surround was a bit more challenging.
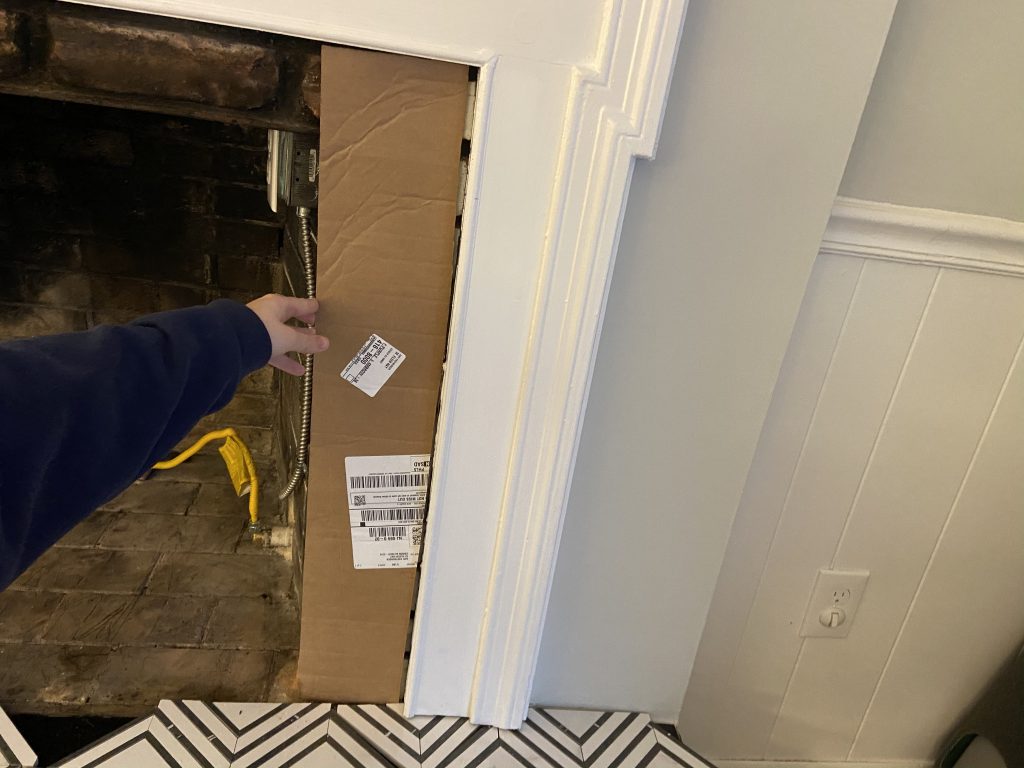
For the surround, I decided to measure and cut out a large piece of cardboard that was the exact size of the fireplace surround. This allowed us to measure tiles and mark them for cutting on a flat surface. I would highly recommend this technique any time you need to cut tile for an irregular shape.
Step 4: Apply Thinset & Grout
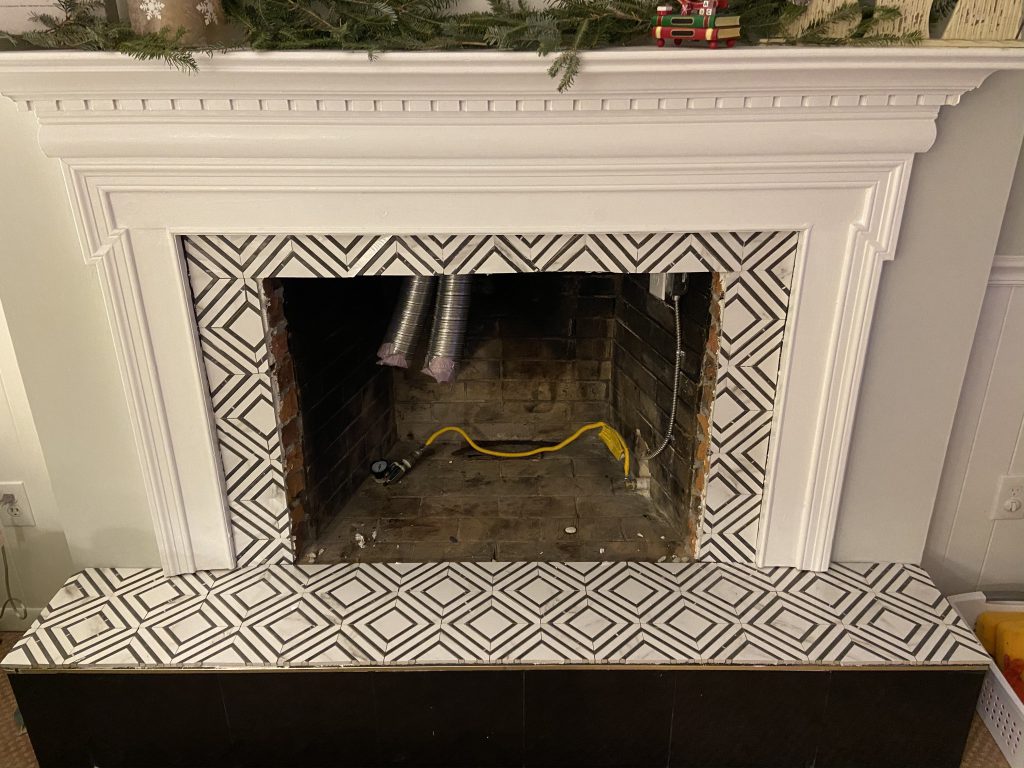
Now that all of our tiles were cut, the project began to be much more straight-forward. We mixed the thinset according to the package directions until it was the consistency of thick peanut butter, then applied it to the hearth and fireplace surround.
After allowing the thinset to dry for 24 hours, we mixed and applied the grout. Grouting all the small lines of the mosaic was a very painstaking process, but it is so worth it in the end!
For instructional videos on tile work, including thinset and grout, we highly recommend the YouTube channel Home Renovision DIY.
Step 5: Covering the hearth with wood
We thought it would look odd to cover every face of the hearth with tile, so we only tiled over the top surface. To cover the ugly black tiles of the rest of the hearth, we decided to use wood to create a sort of shiplap look.
Our hearth was just over one foot tall, and about one foot deep, so we purchased four 1x4s and two 1x2s to account for the front and the sides. As the wood obviously wasn’t all the same widths, we opted to place the 1×2 at the bottom, as people’s eyes likely would not be drawn down to that area.
Keep in mind that the wood purchased from home improvement stores is not perfectly straight. Before cutting, I determined the least warped side, so that it wouldn’t be warping away from the hearth dramatically when we were securing it to the surface.
I then measured and cut each piece of wood to size. If your house is anything like ours, nothing is perfectly square or straight, the hearth included. So, it was necessary to measure where each 1×4 would go individually. I cut each plank using my miter saw, and mitered the ends of each to a 45-degree angle so that the wood on the front and sides of the hearth would form a perfect 90 degree angle.
To secure the wood to the hearth, we used about three tubes of liquid nails. We figured this was much easier than trying to screw into the tile/brick, and much more aesthetically pleasing.
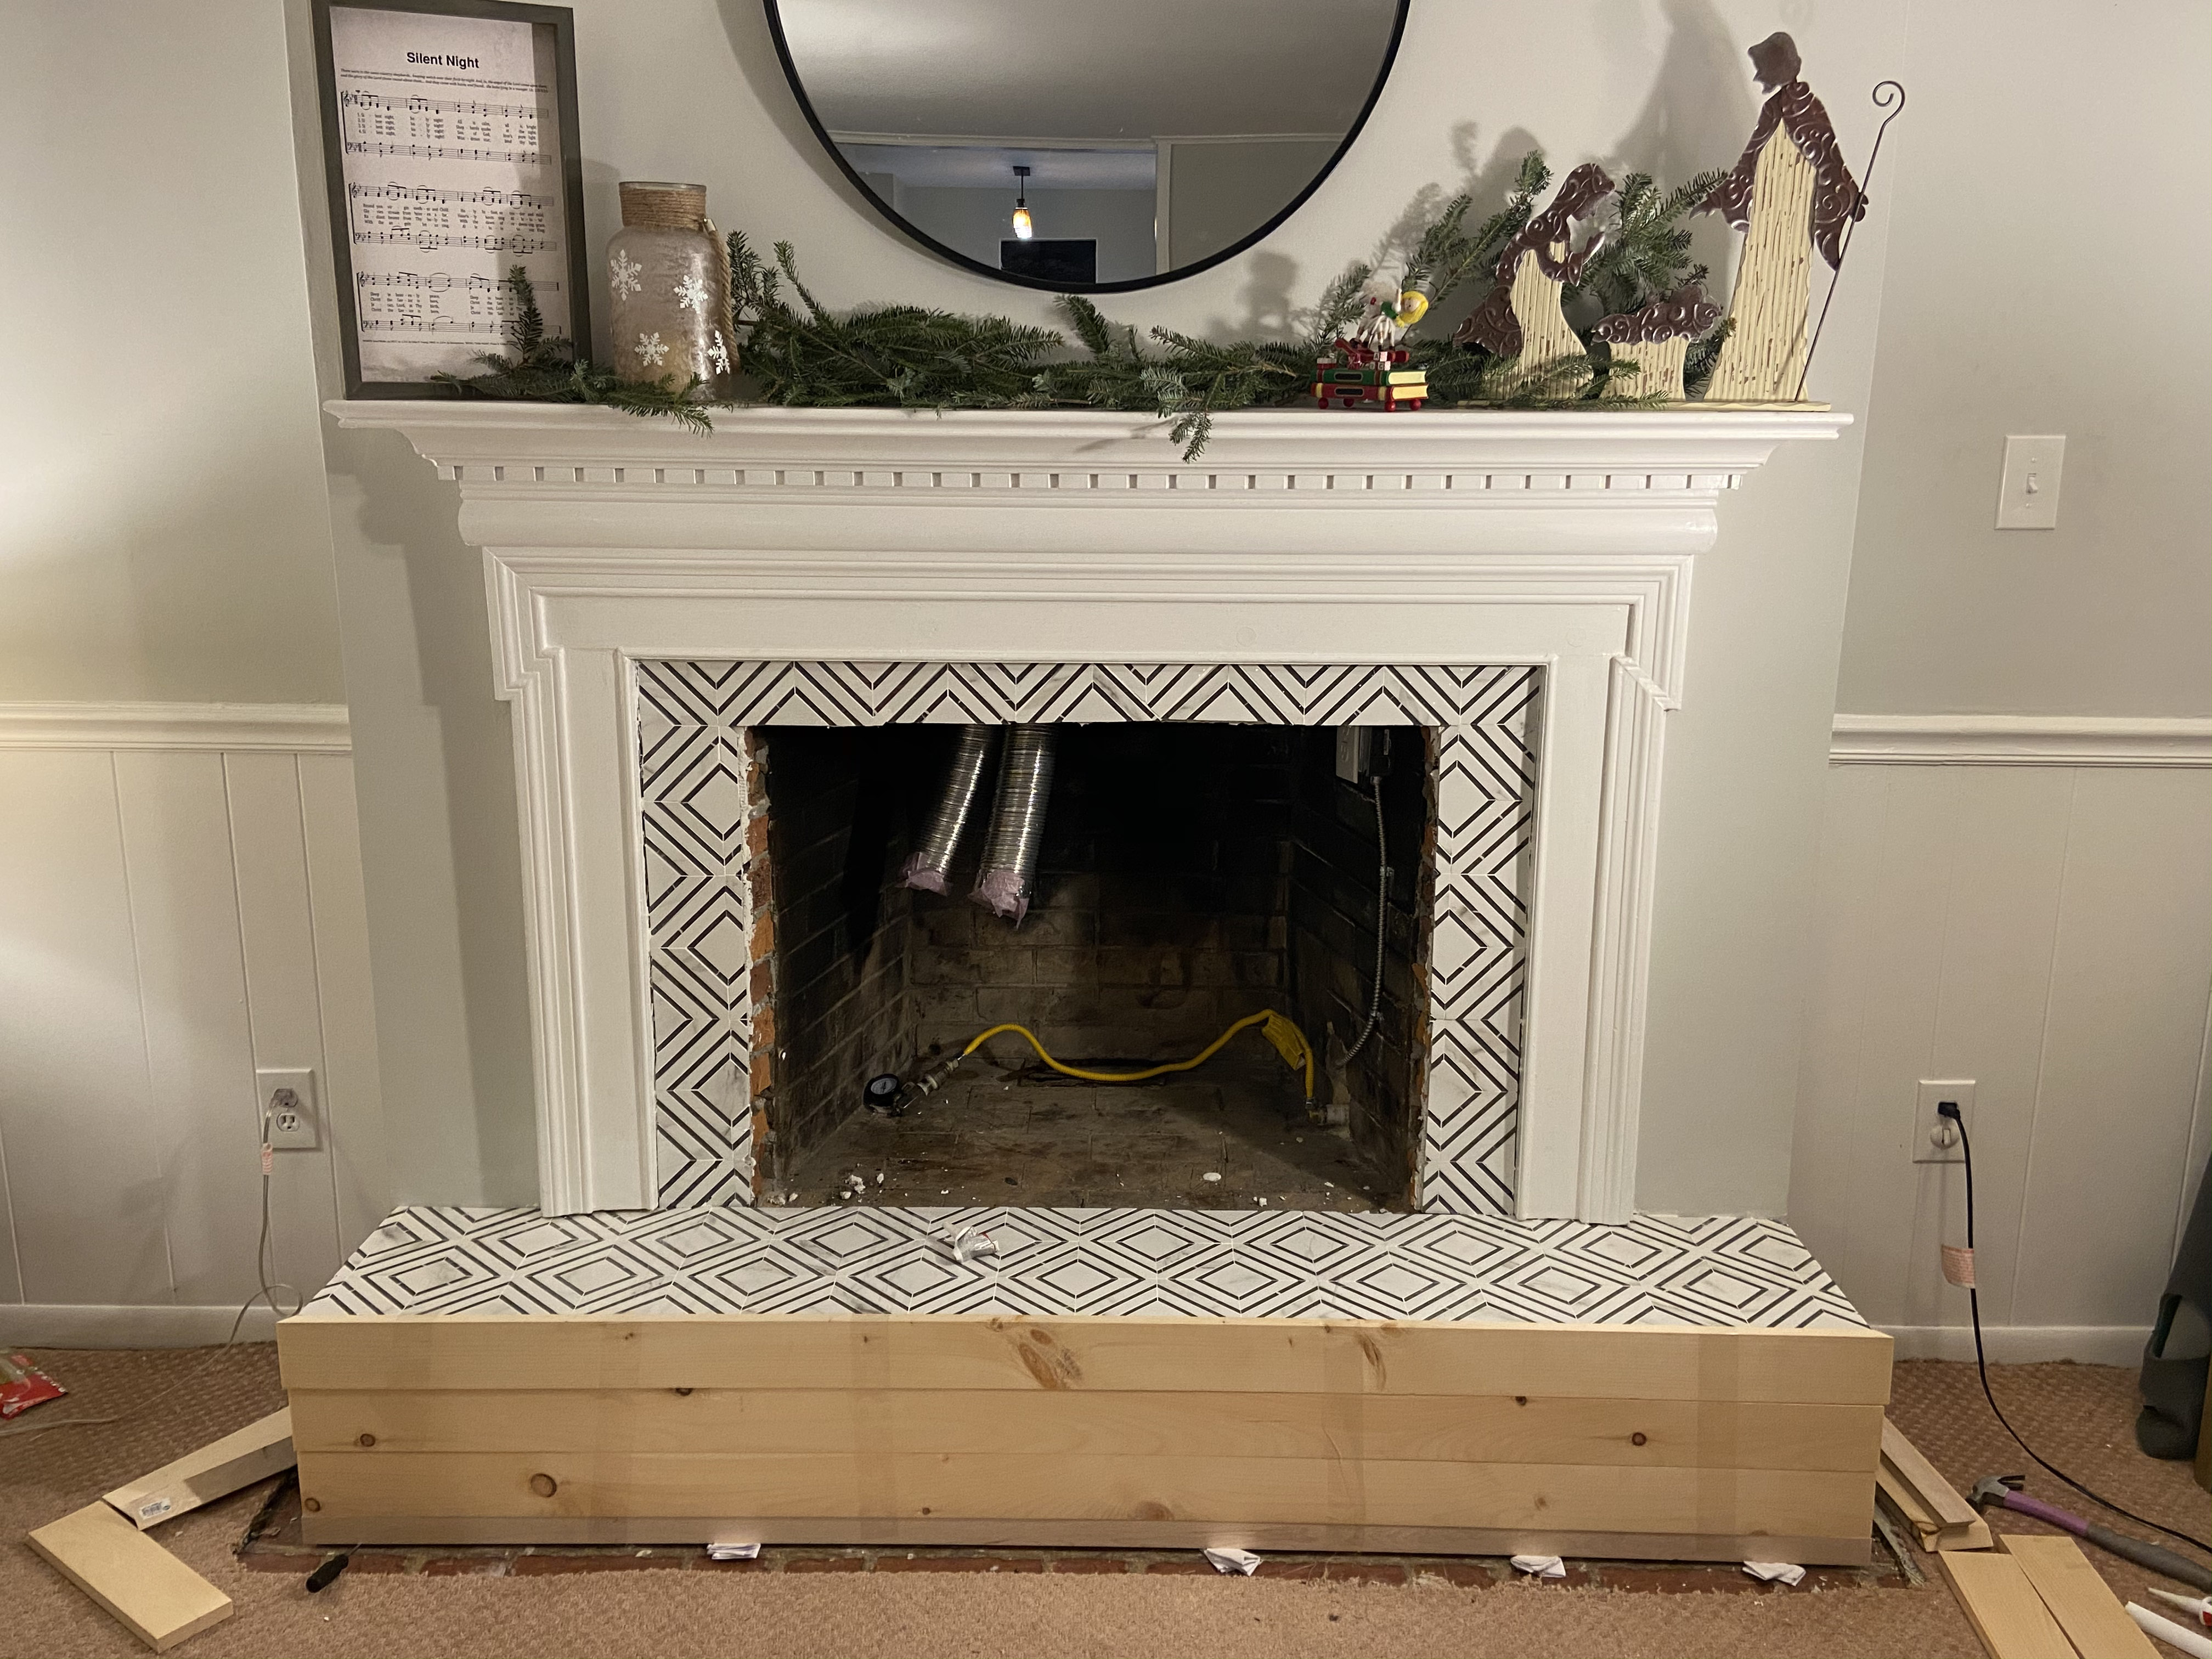
To hold the wood up while it was drying, and force it to actually touch the hearth in all areas rather than warping away, we used tons and tons of tape. We also pushed random heavy objects from around the house against the wood.
From here on out, the process was extremely simple. I filled any gaps at the corners with wood putty, sanded, and painted the wood white. Finally, we caulked around the edge where the tile met the wood.
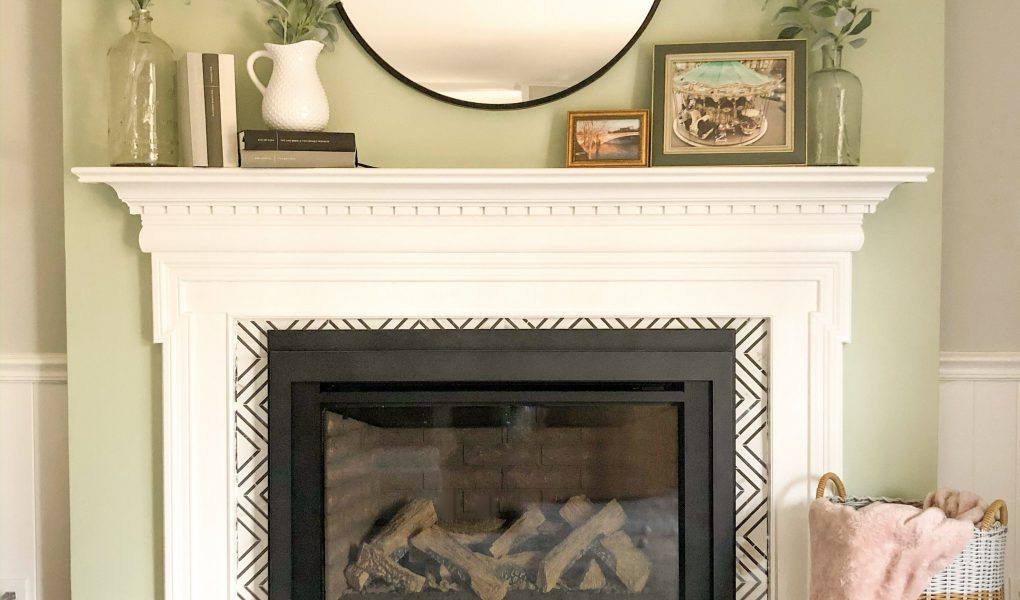
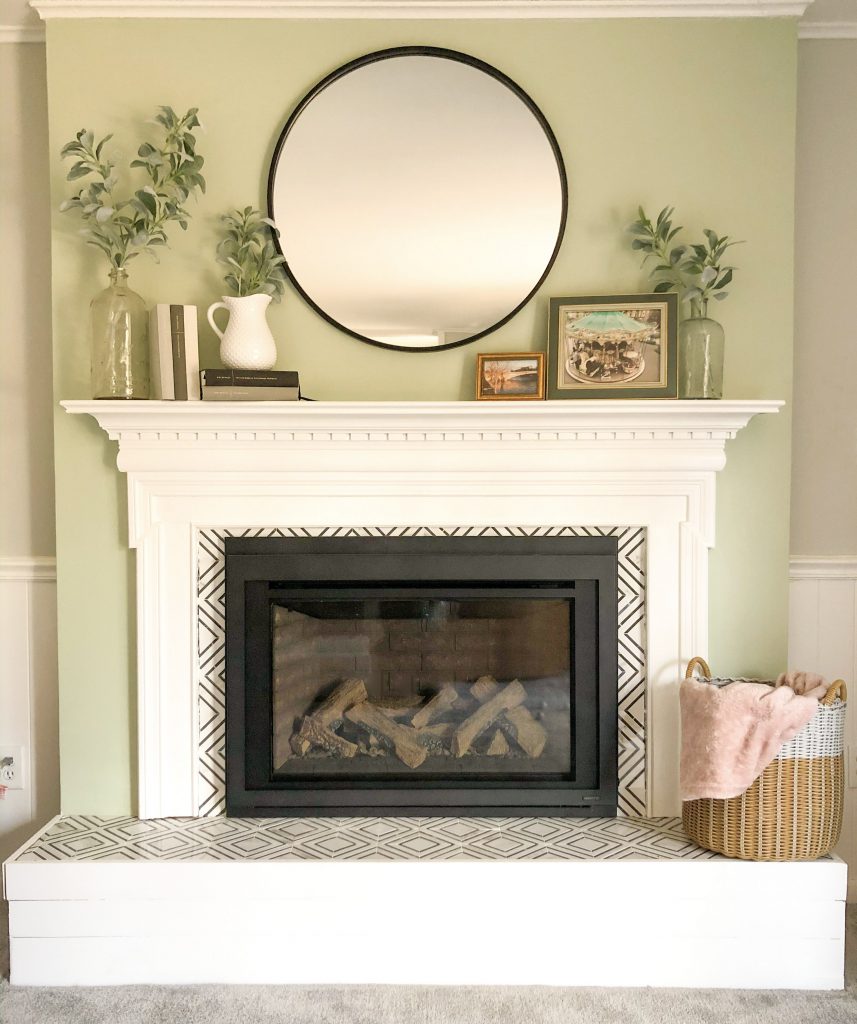
The Final Product
Before actually getting to enjoy the fireplace, we had the professionals install the gas insert. That part of the project was not DIY friendly!
At the end of the day, I’m super happy with how our DIY fireplace renovation turned out. Though we kept our traditional mantel, I feel like the mosaic tile makes it modern. It’s worlds better than the original black tile! Although I typically try to avoid rustic-themed decor, I’m also pleased with how the shiplap ties in with the mantel.
Let me know what you think!