Disclosure: This post may include affiliate links through the Amazon affiliate program or other affiliate partnerships. If you click on a link and buy something, I may receive a commission, at no additional cost to you. You can read more boring disclosure details in my disclosure and privacy policy.
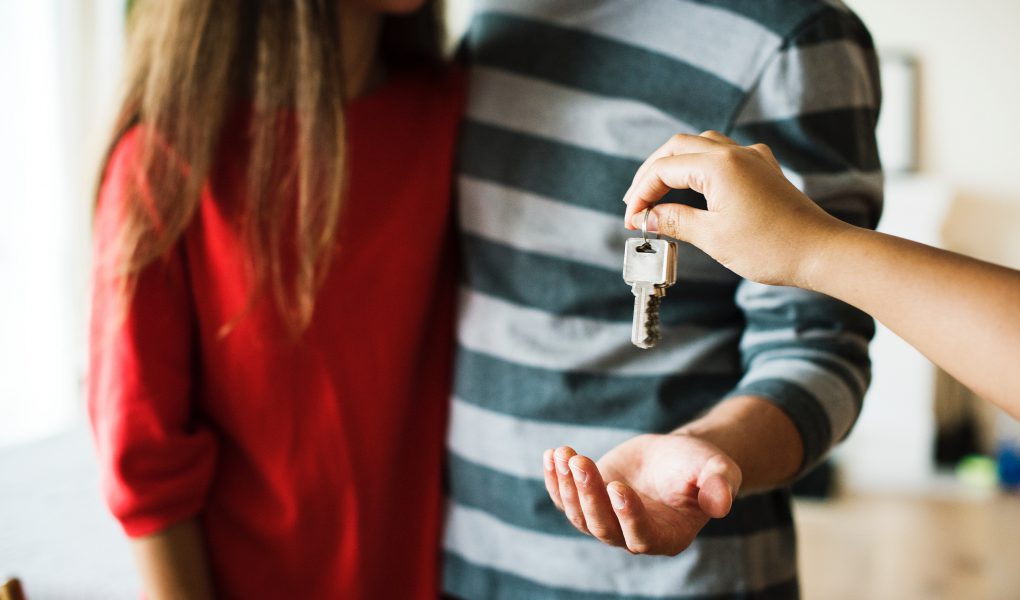
When it comes to moving, I like to think of myself as a sort of expert.
Why’s that, you ask?
Well, we are in the middle of our 4th move in under three years of marriage. Luckily, this time we’re moving because we’re buying a house, so this will be our last move for quite a while hopefully.
In the middle of all the packing, as I put my trusty packing hacks to the test once again, I figured I should sit down and write a post on it while it was all fresh on my mind.
Hopefully, in a couple weeks, I can let these tips fall out of my mind and I won’t need them again.
But if you’re reading this, it’s likely because you’re moving, and that means you desperately need the tips I’ve learned over the years.
These tips will save you time, money, and stress. Happy reading!
1. Become a Box Hoarder
What’s the one thing you absolutely must have when moving? Boxes.
There’s a funny Seinfeld bit about how when people are moving, all they can think about are boxes.
When you’re moving, your whole word becomes ‘boxes.’ That all you think about, is “boxes, boxes, boxes, where are there boxes?”. You just wander down the street, going in and out of stores, “Are there boxes here? Have you seen any boxes?” You actually can smell them at a certain point.
Jerry Seinfeld
As funny as Jerry’s bit may be, it’s 100% true. If you want to get free boxes, you have to become a box hoarder. Live and breathe boxes. Be the boxes.
But seriously, don’t be afraid to ask your friends if they have any you can have. If you see some on the curb outside their house, take them home. Even if they’re just on the curb of a stranger’s house (and they aren’t disgusting), take the boxes!
If you have children in diapers, don’t get rid of those boxes for the few months you’re preparing to move. They’re great because they have handles built in, and you’re getting them for free.
You also can’t be shy about asking for boxes from stores if you need them. This isn’t exactly a secret, but liquor stores are the best place to get boxes. All of their merchandise comes in boxes so they have loads of them waiting to be recycled. They’re also heavy duty, because alcohol in glass containers is not lightweight to ship. As a double bonus, some come with cardboard dividers, which are perfect for moving your drinking cups and wine glasses.
If you know you will be needing boxes, call your nearest liquor store, and ask when they will be getting shipments, or when their recycling gets picked up. Don’t just assume they will have some and walk into the store to pick them up; this might be a huge waste of time if they all got recycled the day before.
Many people also suggest getting boxes from grocery stores, but this hasn’t been true in my experience. We once went to 4 different grocery stores, but none of them had anything useable, because they end up destroying the boxes when they’re unloading inventory.
Also, most big super markets aren’t allowed to give out boxes and they have rules about how they have to recycle. We ended up with about 10 flimsy apple boxes in the end, but it wasn’t worth the time.
Local mom-and-pop liquor shops will be your best bet for the free boxes.
I will say that each move, I go to Home Depot and buy about 15 boxes for a little over a dollar a piece. This is because liquor store boxes or diaper boxes are all roughly the same size, and sometimes you simply need something bigger to fit stuff in. Home improvement stores are great for buying some really large, versatile boxes.
2. Shop Online
So, this tip is still about getting free boxes, but I felt like it warranted its own section. (Geez, is anyone else getting really sick of the word ‘boxes’?)
When you’re preparing for your move, order everything you can online. This will give you a ton of boxes for free, and some smaller sizes which can be useful for packing fragile items.
I found ordering from Walmart to be really useful during the move. I ordered a bunch of items that I needed anyway, like fabric softener and batteries, with free shipping because my items were over 35 dollars. (This isn’t sponsored, it’s just smart advice.)
The great thing about ordering from Walmart actually isn’t the free two-day shipping or convenience of never having to walk into the store. It’s actually that they’re horribly inefficient at packaging the items.
This works out really well when you’re moving, because they send stuff in huge boxes stuffed with tons of packing paper to fill the empty space. This is another double win: 1) You get some huge boxes for free and 2) You can reuse the packing paper to pack fragile items like mugs or bowls.
3. Use Your Blankets
Blankets are such a useful tool during moving, don’t toss them willy nilly into garbage bags and suitcases!
Heavy duty moving blankets will cost you quite a bit to rent at a U-haul location or from your local moving company. Unless you’re moving a great distance (like, hundreds of miles away), you probably don’t need them.
Gather all the blankets you have around the house and save them in a pile for moving day. When the time comes, you can toss them over furniture to protect the finishes from rubbing against each other in the moving truck.
Blankets can also be used in place of bubble wrap or packing paper at times. This year I packed all of my big serving bowls and platters using a throw blanket I had laying around. It provides a soft cushion, yet was so big that I only needed one blanket for all of my serving ware.
4. Use Your Plastic Grocery Bags
I don’t know if anyone else has this problem, but my house seems to be overrun with plastic grocery bags. And this is despite me doing all of my shopping at Aldi with reusable bags! For some reason, they pile up and accumulate and multiply all on their own. Perhaps because they can’t be mainstream recycled, and I can never find a dedicated plastic-bag recycling center.
Put all of those bags to good use during the move! Four or five bags provide a really solid cushion for your fragile items. Wrap them around a fragile knick-knack, or layer them in between picture frames to protect the glass.
5. Use Clothes to Pack Fragile Items
Hopefully you’re getting the sense by now that I see no point in spending money on bubble wrap or packing paper.
Use t-shirts, underwear, dish towels – pretty much any type of fabric – to protect your valuables. It saves money and space by combining multiple belongings into one box.
6. Saran Wrap Your Rugs
Have you ever tried to move a rolled-up carpet that isn’t secured in any way? I wouldn’t recommend it. It’s awful. As soon as you pick up the carpet, it starts to unroll itself from the inside-out, and then you’re left wrangling a half-unrolled carpet into the truck.
Now, I ask, have you ever ordered an area rug online? Have you noticed how it is wrapped in shrink wrap and tape and stays rolled the entire moving process?
You can replicate this packing method using saran wrap. Simply take the roll out of it’s cardboard packaging, and, starting at the top and working down, roll the wrap all the way around the rug. Make sure it is covered completely and tightly to be sure it will stay together while moving. Then, secure the top, middle, and bottom of the rug with tape.
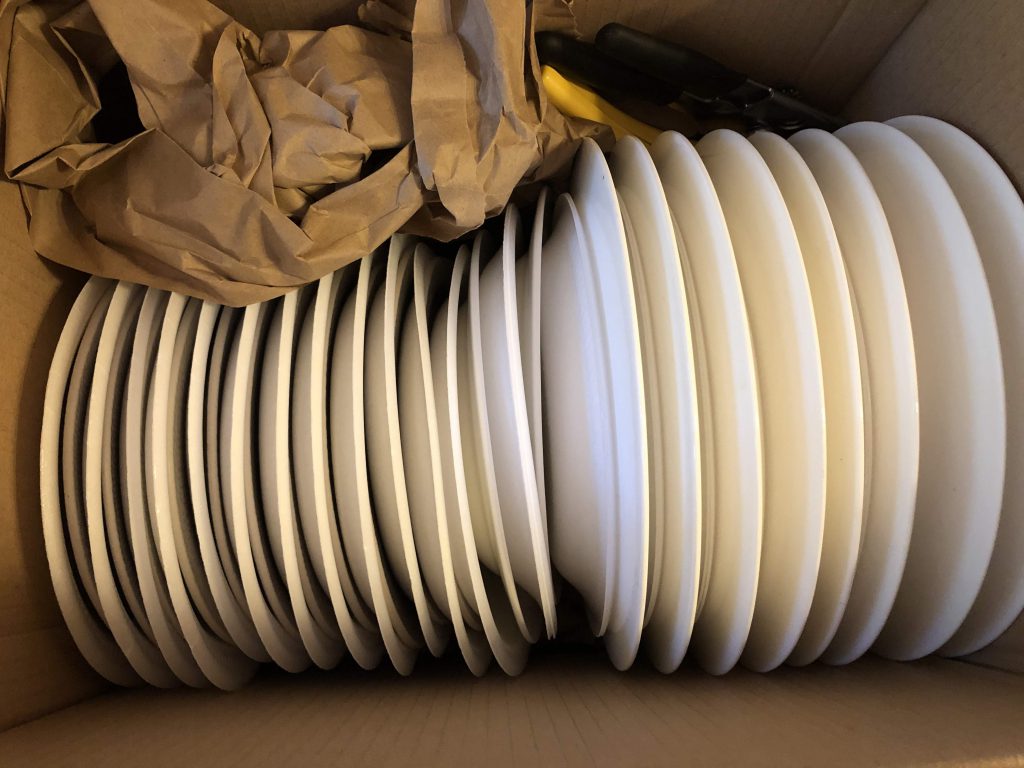
7. Pack Dishes Using Styrofoam Plates
This might be my favorite moving tip yet, because it makes the process of packing your plates go so fast.
For this, go grab a big stack of the disposable styrofoam plates from the grocery store for like 3 dollars. Don’t worry, after you’ve moved, you can eat off of the plates when friends are over.
First, lay down some plastic bags or packing paper at the bottom of the box to provide some cushioning for your plates.
Then, begin stacking the plates vertically with one or two styrofoam plates in between each one. It’s important to stack them like a filing cabinet, rather than on top of each other. This is because the weight of the plates pressing on each other can lead to breaks during the move.
Be sure to fill the box as tight as possible, without overstuffing, to limit the amount of moving around/jostling during the move. Then, cover with packing paper, and you’re good to go!
8. Pack Your Boxes Correctly
I am admittedly a bit anal about how to pack boxes when moving, but it’s because it minimizes the chances that your box will bust open and all your valuables will go crashing to the floor. For the record, I’ve moved three times already (not including college), and I’ve never broken anything during a move.
When you tape your boxes during assembly, the tape should go at least 1/3 up the sides of the box to maximize strength. I recommend this tape – it’s strong and doesn’t give off a super funky chemical smell like some others I’ve tried.
Do not overstuff your boxes. I repeat! Do. not. overstuff. your. boxes. This is for sooo many reasons:
- It weakens the integrity of the box.
- It puts more strain on the single piece of tape that keeps your items in the box.
- It makes the boxes way heavier then they should be. Don’t break your friend’s backs – balance heavy and light in each box with the right amount of items!
- An overstuffed box will not be flat on top. Boxes that aren’t flat are harder to stack in the moving truck, and are more likely to take a tumble during the drive.
Thirdly, as I kind of mentioned in my list above, don’t make the boxes too heavy! It is a bad idea to pack your cast iron pan and your Le Creuset dutch oven and your 20 pound Costco bag of flour in the same box, because it will be far too heavy for one person to lift without injuring themselves. Two people might be able to, but it will slow them down. Instead, pair the cast iron pan with some light plastic cooking utensils.
The same theory applies to books; pack them in the smaller liquor store boxes rather than trying to cram all of your novels in the same huge box. Side note: Some people recommend putting all of your books in a large suitcase, because then your books can be rolled instead of carried. We tried this, and the weight of the books ripped the suitcase apart. 1/5 stars on that method.
9. Pack Your Closet Using Garbage Bags
This is a popular suggestion, but just in case this is the only moving post you ever read, it’s definitely worth mentioning again. This is by far the easiest way to pack up your closet.
Starting from the bottom of the garments, pull the garbage bag over about 10 items of clothing. Use the handles of the bag to secure the bag over the hangers. Do not overstuff the garbage bags – they’ll rip and your hard work will be pointless.
This is a fast, efficient way to pack your closet. It’s also efficient because when you are unpacking your new home, simply put the clothes in the closet and take off the garbage bags. You can even reuse the garbage bags for actual garbage when you’re done.
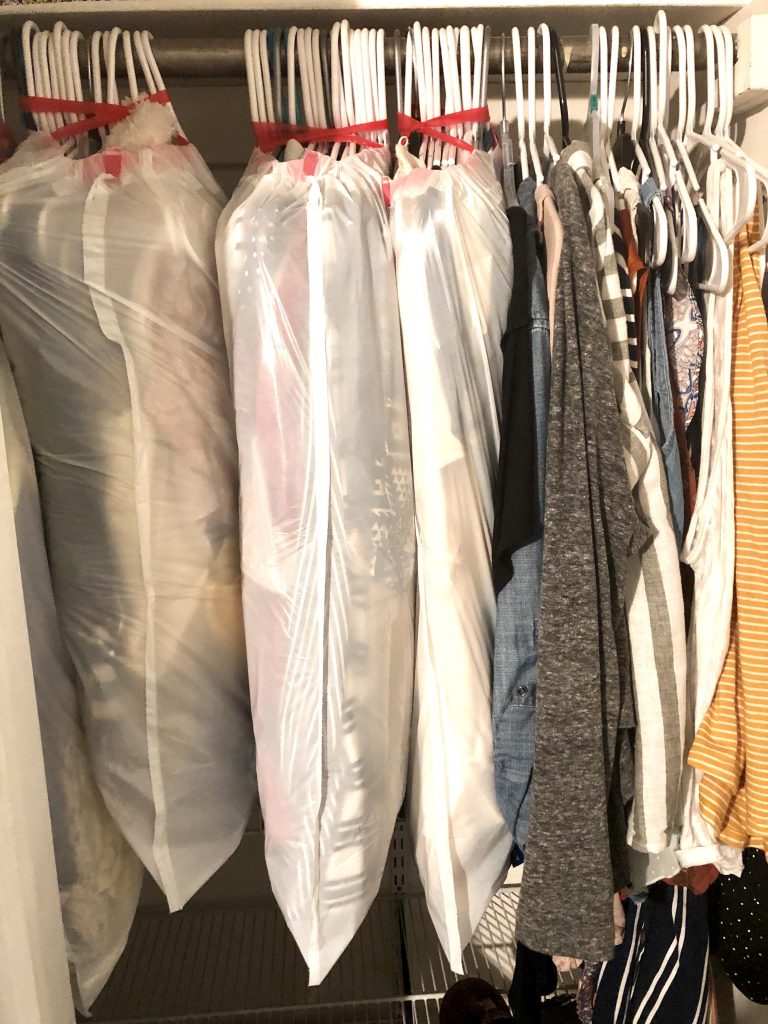
Let me just say that the picture below, from rent.com, is not the way to execute this tip.
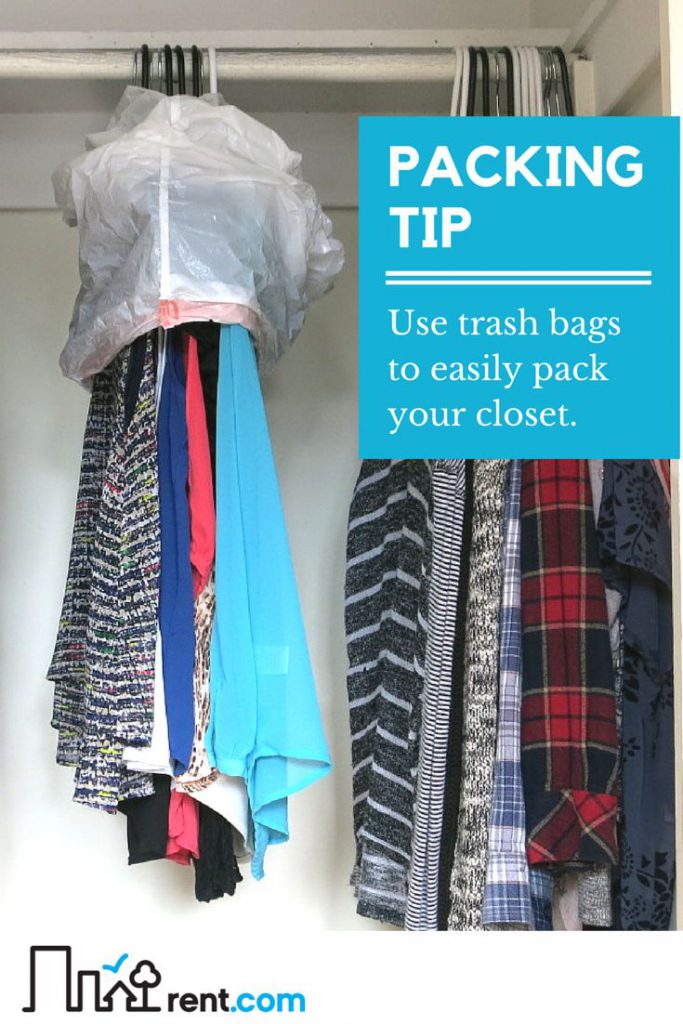
This picture shows that they punched a hole in the garbage bag. This is silly because it ruins the garbage bag, and now the handles are hanging upside down and useless. They have also lost the added benefit that when the bag surrounds the clothes, if anything falls off of the hanger during the move, it will fall into the bag rather than onto the ground.
10. Color Code Your Boxes
Color coding your boxes by room makes it easier for your friends or the movers to move your belongings into the new home. Unloading the truck and unpacking your belongings will be so much faster.
Take it from me on this one, I didn’t do this once, and everything ended up on the wrong floor of the house. Being 8 months pregnant at the time, it took me forever to unpack because I had to wait for my husband to come home from work and move boxes.
Some people recommend buying duct tape in different colors for labeling. I’ve looked into this, and found that at roughly 3 dollars a roll, it’s too expensive assuming you need multiple colors. Instead, I recommend buying a big pack of construction paper with 10+ colors. Assign one color per room, then tape that color construction paper on the door of the corresponding room.
11. Pack a Moving Day Box
This doesn’t need to be a fancy plastic tote bin with a cutesy laminated label or anything. It just needs to function.
Use any box and fill it with essentials you will need on moving day – cash for tips or food, a box cutter, and toilet paper! I also always carry these cool solar lights that my dad got me. They are magnetic, so you can stick them on the side of the moving truck, and they provide light in the dark corners or if you’re still unloading at night.
Make sure it is clearly labeled, and take it with you in your car instead of on the moving truck so that it doesn’t get lost in the sea of other boxes.
12. Use Plastic Baggies for Hardware
As soon as you unscrew anything or remove hardware from the wall, put it in a plastic sandwich baggie, and then label it clearly. This makes it so much easier to reassemble things when you’re in your new place.
You can either tape the baggie to the item (for example, tape your picture hanging hardware to the back of the frame), or put all of the hardware together in one box.
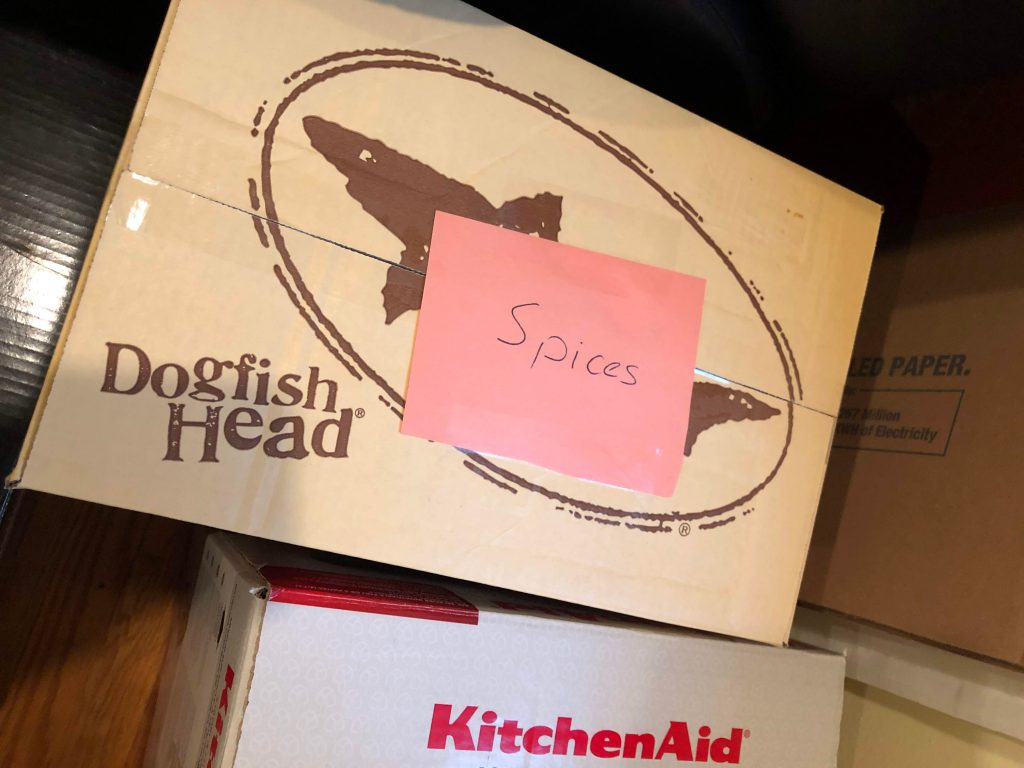
13. Write on both the top and side of the box
Because boxes tend to get stacked in both your home and the moving truck, I recommend writing the contents of the box on both the top and side surface. This way, you can see what’s inside even when they’re stacked. This is especially important for fragile items, so that the movers will continue to see the huge “FRAGILE” on your box and not forget about your grandmother’s china.
Some people also say to do a numbering system with a master spreadsheet of the contents, but if I’m honest, I just don’t have time for that kind of organization. A sheet of construction paper and a sharpie is good enough for me!
14. Skip the TV Box
You should probably skip over this one if you’re moving long-distance. But, if you aren’t moving more than a short drive away, don’t waste your money on the flat screen TV boxes. They are not cheap at over 20 dollars.
Instead, my husband and I tend to take the memory foam mattress topper off the top of our bed, fold it like a taco in the backseat of the car, and then put the TV in between the folds of the memory foam. It has protected the TV through every move in college and the 3 moves of our marriage, so I think it’s safe to say it’s fairly risk-free.
15. Be Kind to Your Friends
If your friends are helping you move, please do your very best to make it a good experience for them! Aim for the move to be finished within a few hours so they still have time left in their Saturday afterwards.
Don’t be that person that hasn’t packed any of their boxes when their friends show up. Just don’t. You may think it’s ridiculous that this happens, but I can think of a few people I know who have done it. Have everything packed away and ready to go when they show up.
Feed them! We usually do bagels in the morning before the move, and then pizza or Chipotle after everything’s done. If you treat your friends well, they’re much more likely to agree to help you the second (or third…) time you move!


“The great thing about ordering from Walmart actually isn’t the free two-day shipping or convenience of never having to walk into the store. It’s actually that they’re horribly inefficient at packaging the items.”
My favorite quote hahahahaha
In other news, my favorite hack is definitely #7. I never would have come up with the idea for that on my own!
Haha, it’s the truth! I ordered packing paper and it came in a HUGE box that I used to pack all of our board games! And yes, it makes the packing go so fast!
Great packing hacks! I use towels & washcloths & hand towels for cushion. I have to move them, too; might as well make them earn their keep!
Also, I write on the top & 2 sides of the boxes. No matter how they’re loaded, it can be read. And, I write the date I packed that box. So, I may move and open/empty it immediately, sometimes I pack things that’ll sit for awhile. Having a date helps.